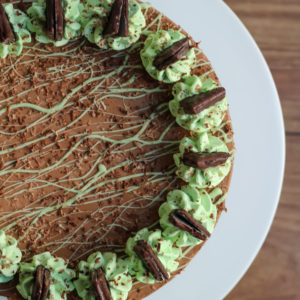
No-Bake Mint Chocolate Cheesecake
With a deliciously minty Oreo biscuit base and creamy chocolate and mint cheesecake filling, this no-bake cheesecake is an ideal make-ahead festive dessert!
Equipment
- 20cm/8inch deep springform cake pan
- Electric hand or stand mixer
- Spatula
Ingredients
Biscuit Base
- 260 g Oreos biscuits and filling
- 100 g unsalted butter melted
- 30 g light brown sugar
- 1/2 tsp peppermint extract
Cheesecake Filling
- 290 g double cream cold
- 630 g full fat cream cheese (I use Philedelphia) room temperature
- 160 g icing sugar sifted
- 200 g dark chocolate melted
- 1 tsp peppermint extract
Decoration
- 200 ml double cream cold
- 50 g white chocolate melted
- green gel food colouring to colour the cream and white chocolate
- Your choice of mint chocolate pieces I used After Eights in my photos, which I cut up into smaller triangles to place on top of the whipped cream
- 1 square finely grated chocolate to sprinkle on top to finish
Instructions
- Firstly weigh your cream cheese into a small bowl, cut into smaller pieces and set aside to come to room temperature. Next, melt your dark chocolate and set aside to cool.
- Crush your Oreo biscuits into fine crumbs (both biscuit and filling!). You can do this by pulsing them in a food processor, or placing them into a sandwich bag and bashing them with a rolling pin. Add to a medium-sized bowl along with the light brown sugar, then whisk to combine.

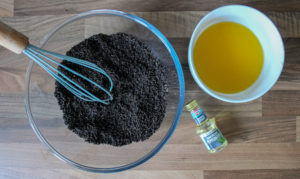
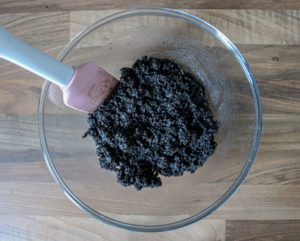
- Pour the melted butter and peppermint extract into this bowl and fold it all together with a rubber spatula until evenly combined.
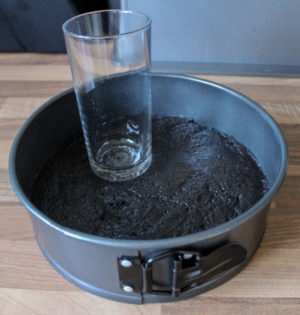
- Pour this biscuit mixture into your 20cm/8inch deep springform cake pan and press down very firmly to pack the biscuit base nice and tight, either with your rubber spatula or the base of a glass as shown. This will help it set more firmly! Place the pan in the fridge to chill while you make the cheesecake filling.
- Using the bowl of your stand mixer or a large bowl if using an electric hand mixer, whisk the double cream on medium-high speed until it's really thick. This usually takes around 1-2 minutes with my KitchenAid stand mixer. This step is important to ensure your cheesecake sets nice and firm!
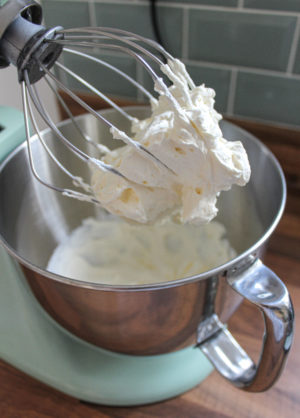
- Transfer the thickly whipped cream to a smaller bowl. You can now use this same mixing bowl for the next step; don't worry about washing it!
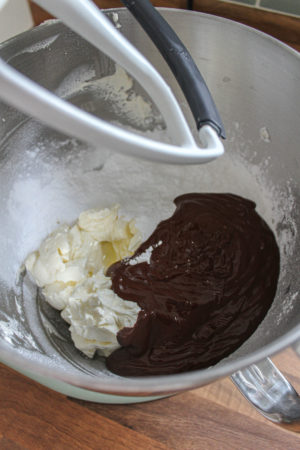
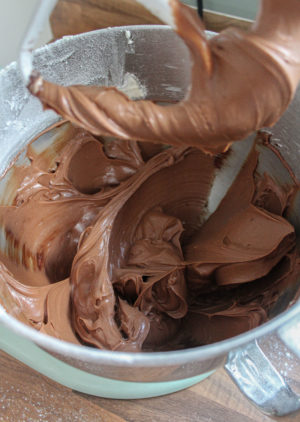
- Add the cream cheese, melted dark chocolate, icing sugar and peppermint extract to this mixing bowl. Change the whisk attachment on your mixer to the beater attachment, and beat this mixture on medium speed until smooth and well combined. This usually takes around 30 seconds with my KitchenAid mixer.
- Next, add your thickly whipped cream to this cream cheese mixture and fold it together carefully with your rubber spatula. Scrape the sides and bottom of the bowl with your spatula to make sure the ingredients are all well combined.
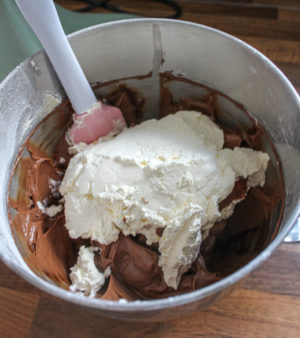
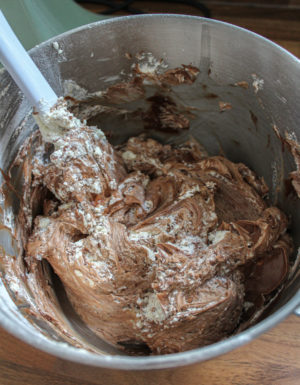
- The mixture will be quite thick so that your spatula should be able to stand upright in it!
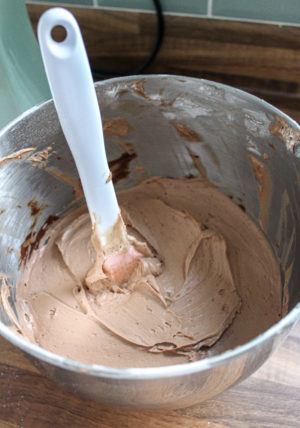
- Pour this mixture into your 20cm/8inch deep springform cake pan and level the top with your spatula; the mixture should almost reach the top of your pan.
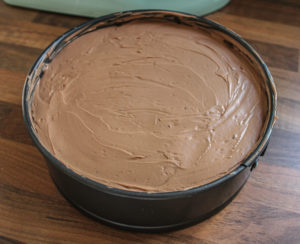
- Place the pan back into the fridge and chill the cheesecake for at least 8 hours (but ideally overnight) to ensure it's firmly set before serving.
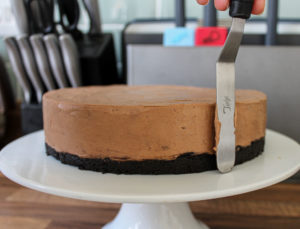
- Once the cheesecake has set, remove it from your springform pan and carefully slide it onto your chosen serving plate. You might need to gently go around the edges of the biscuit base with a knife to loosen it from the pan base before sliding it off.
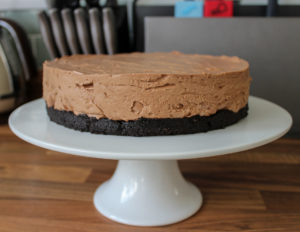
- You can smooth out the top and sides by going around it with a small palette knife.
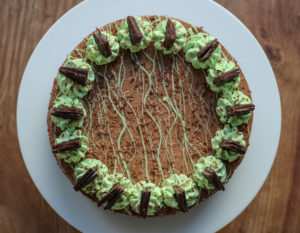
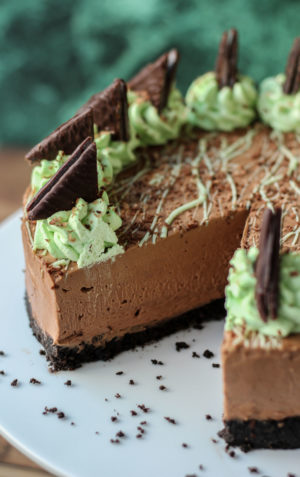
- It's of course up to you how you'd like to decorate your cheesecake! I decided to melt white chocolate in the microwave and colour it green with a little green gel food colouring. I then drizzled this across the cheesecake with a fork. Next, I whipped up some more double cream, piped swirls around the edge of the cheesecake and placed small pieces of After Eight on top (I piece = 4 small triangles).To finish, I finely grated a single piece of milk chocolate across the top of the cheesecake!
- Store the cheesecake in the fridge between servings and it is best eaten within 5 days (though check the expiry dates on your double cream and cream cheese as if they expire sooner, so will your cheesecake!)
Notes
If you’ve tried this recipe, tag @bakerjoblog on Instagram, Facebook, Pinterest or Twitter and/or use #bakerjoblog!