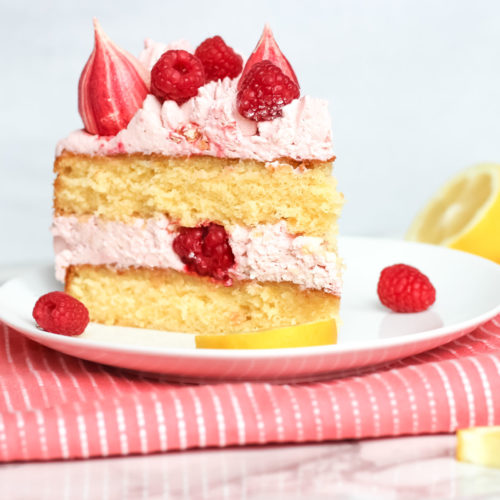
Lemon Raspberry Cream Cake with Meringue Kisses
A delicious combination of light yet moist lemon cake, freshly whipped raspberry cream, fresh raspberries and sweet meringue kisses. A beautiful yet easy lemon layer cake recipe!
Ingredients
Lemon layer cakes
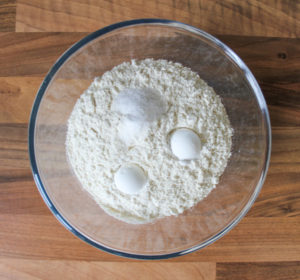
- 275 g plain flour
- 2 tsp baking powder
- 1/2 tsp salt
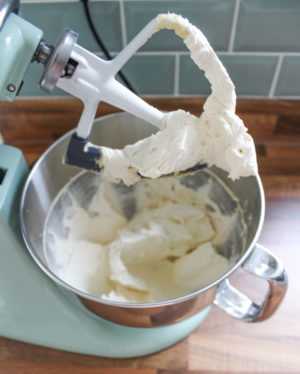
- 200 g butter softened to room temperature
- 200 g caster sugar
- 75 g light brown sugar sifted to remove lumps
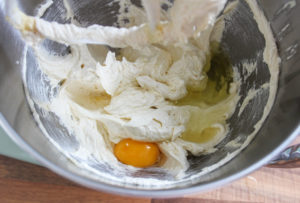
- 4 medium eggs room temperature
- 1 medium egg yolk room temperature
- 1 tsp vanilla extract
- zest of 2 lemons
- juice of 1 lemon room temperature
- 60 ml buttermilk room temperature
Lemon drizzle syrup
- 90 g caster sugar
- juice of 1 lemon
Raspberry whipped cream
- 300 g fresh raspberries (200g for whipped cream purée - keep 100g for decorating)
- 600 ml double cream
- 2 tbsp sifted icing sugar heaped
Meringue kisses
- 1 medium egg white room temperature
- 60 g caster sugar
- Red gel food colouring
Instructions
Lemon cakes
- Preheat your oven to 180°C/160°C fan. Grease two 20cm sandwich tins with butter or non-stick spray and line the base with a circle of baking paper.
- In a medium sized bowl whisk together the flour, baking powder and salt, and set aside.
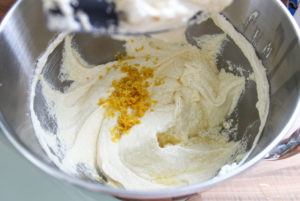
- In the bowl of a stand mixer with a paddle attachment (or large bowl if using a hand whisk), beat the softened butter on medium speed for around 30 seconds, to soften it a little more. Then add both sugars to the butter and beat on medium-high speed for 3 full minutes, until very pale and fluffy.
- Next add the eggs one by one, mixing on low speed for around 20 seconds between each addition, finishing with the egg yolk. Then add the lemon juice, lemon zest and vanilla extract and beat for 20 seconds until just combined.
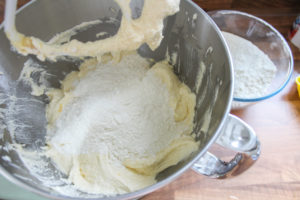
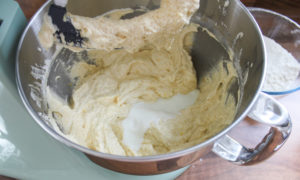
- Add 1/2 of the dry ingredients, mix on low until just combined, then add 1/2 of the buttermilk, and again mix until just combined. Repeat these steps until all added, finishing with the buttermilk. Do not over-mix!
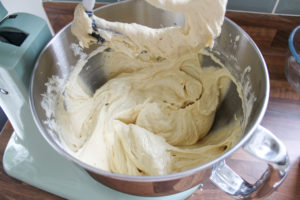
- Pour the batter evenly into the two prepared sandwich tins and level the batter with a spatula or palette knife. They will each be about 2/3 full and the mixture will be slightly thick.
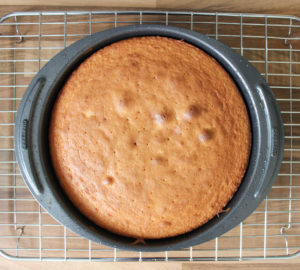
- Bake on the middle shelf of your preheated oven for 25 minutes until golden brown, slightly shrinking away from the sides of the tins and a skewer inserted into the middle of each cake comes out clean. Do not open the oven door before this time or they may sink in the middle.
- Place the cakes onto a cooling rack and then reduce the oven temperature to 120°C/100°C fan, ready for the meringue kisses.
Lemon drizzle syrup
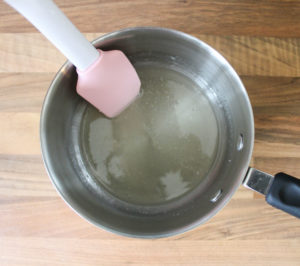
- Place the caster sugar and lemon juice in a small saucepan and place on a low heat, stirring gently and continuously with a heatproof spatula until the sugar has dissolved (where you can no longer feel any grains of sugar when stirring).

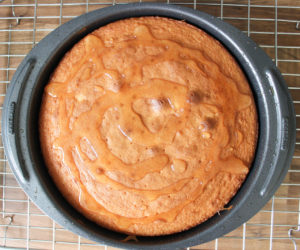
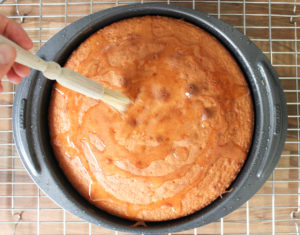
- Poke several holes all over each cake with a cake skewer then pour the lemon syrup as evenly as possible over each cake. Once you’ve poured it all on use a pastry brush to spread it more evenly. Leave the cakes to cool completely in the tins.
Meringue kisses
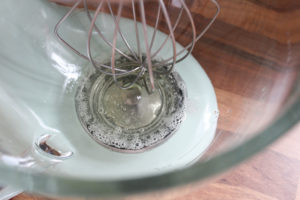
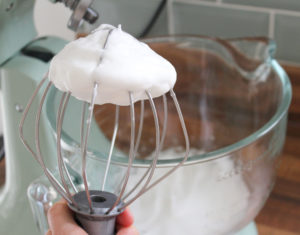
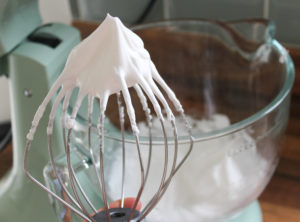
- Whisk the egg white on medium speed for 1 minute until slightly bubbly. Then whisk on high for around 2 minutes, until stiff, foamy peaks are formed. Now add the caster sugar a tablespoon at a time, with the mixer still on high. Once all the sugar has been added continue mixing for around a further 20 seconds to make sure it is fully incorporated. You can tell if the meringue is ready by taking the whisk attachment off and holding it upright; the meringue should hold its shape (I’m not brave enough to try the bowl-over-head method!)
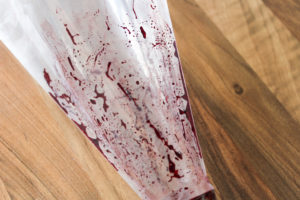
- Line a baking tray with baking paper (I use a silicone baking mat and line with baking paper also). Prepare a piping bag fitted with a 1cm round piping nozzle and using a spoon/fork/cocktail stick, dip into the red gel food colouring and draw lines/streaks inside the piping bag (don’t worry about being too neat, my lines weren’t straight at all!). Now add the meringue mixture to the piping bag, and pipe 1-inch mounds onto the baking paper; don’t worry about leaving a lot of space between them as they won’t spread as they bake.
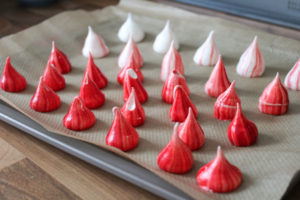
- Place the baking tray into the preheated oven on the medium shelf and bake for 1 hour. After one hour, turn the oven off but leave the baking tray in the oven and allow the oven to cool completely before removing.
Raspberry whipped cream
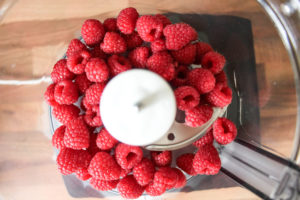
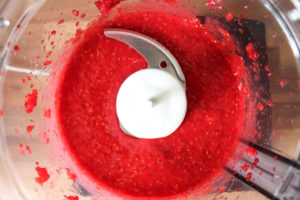
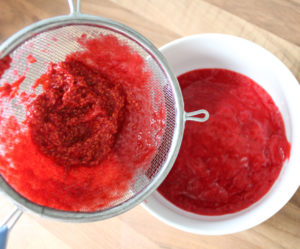
- First add 200g of the fresh raspberries to a food processor (keep the remaining raspberries for decoration) and blend to a smooth liquid with no large lumps (this took around 20 seconds in my food processor). Pour the liquid through a sieve into a bowl and use the back of a spoon to help push the mixture through the sieve. This is to remove all of the seeds and any remaining lumps to leave you with a smooth raspberry purée. This yields around 130ml of purée.
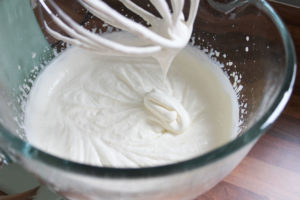
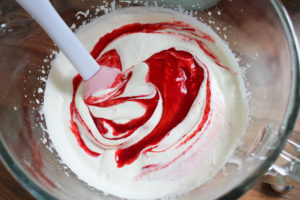
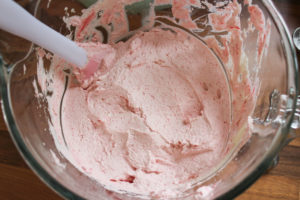
- Next, using the whisk attachment on your stand mixer (or hand mixer), whisk the double cream with the sieved icing sugar on medium-high speed for around 1 minute until the cream has just started to thicken slightly but is too runny to pipe. Now gently fold in the raspberry purée by hand using a rubber spatula, until incorporated evenly. It will thicken as you do this.
Assembling the cake
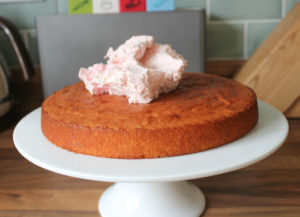
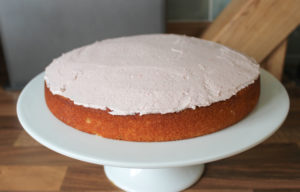
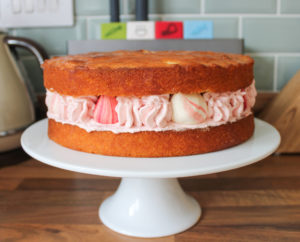
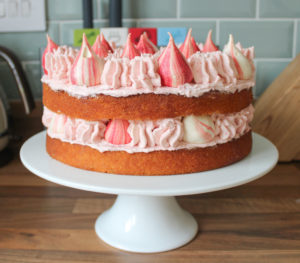
- Place the first cake layer onto your serving plate; I place it drizzle side up. Add a thin layer of whipped cream with a palette knife and then add some of the meringue kisses, first adding around the edges then filling the middle. Space the meringues as evenly as possible as they are the main support for the top cake layer (I snap the tips off of these meringue pieces so that the top cake layer has more stability!). Pipe rounds of whipped cream in all remaining spaces between the meringues, including around the outside edge. Then add several raspberries evenly on top/between the whipped cream, keeping enough to do the same with the top of the cake.
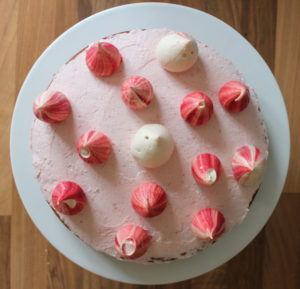
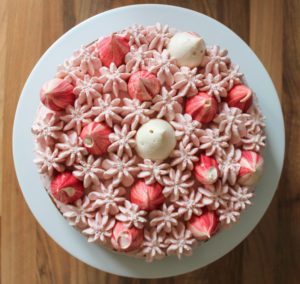
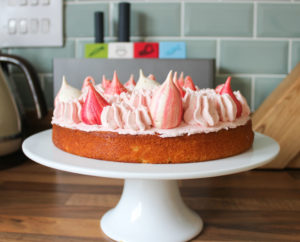
- Now add the next layer of cake and repeat this process if you wish, or make your own design on top using your remaining meringue kisses, raspberries and whipped cream!
- Keep refrigerated and serve on same day of assembling. I’d advise to eat within three days.
Notes
You can easily make this gluten-free by just substituting the plain flour with the same amount of GF flour, and adding 1/2 tsp Xanthan gum - same bake time!
If you’ve tried this recipe, tag @bakerjoblog on Instagram, Facebook, Pinterest or Twitter and/or use #bakerjoblog!