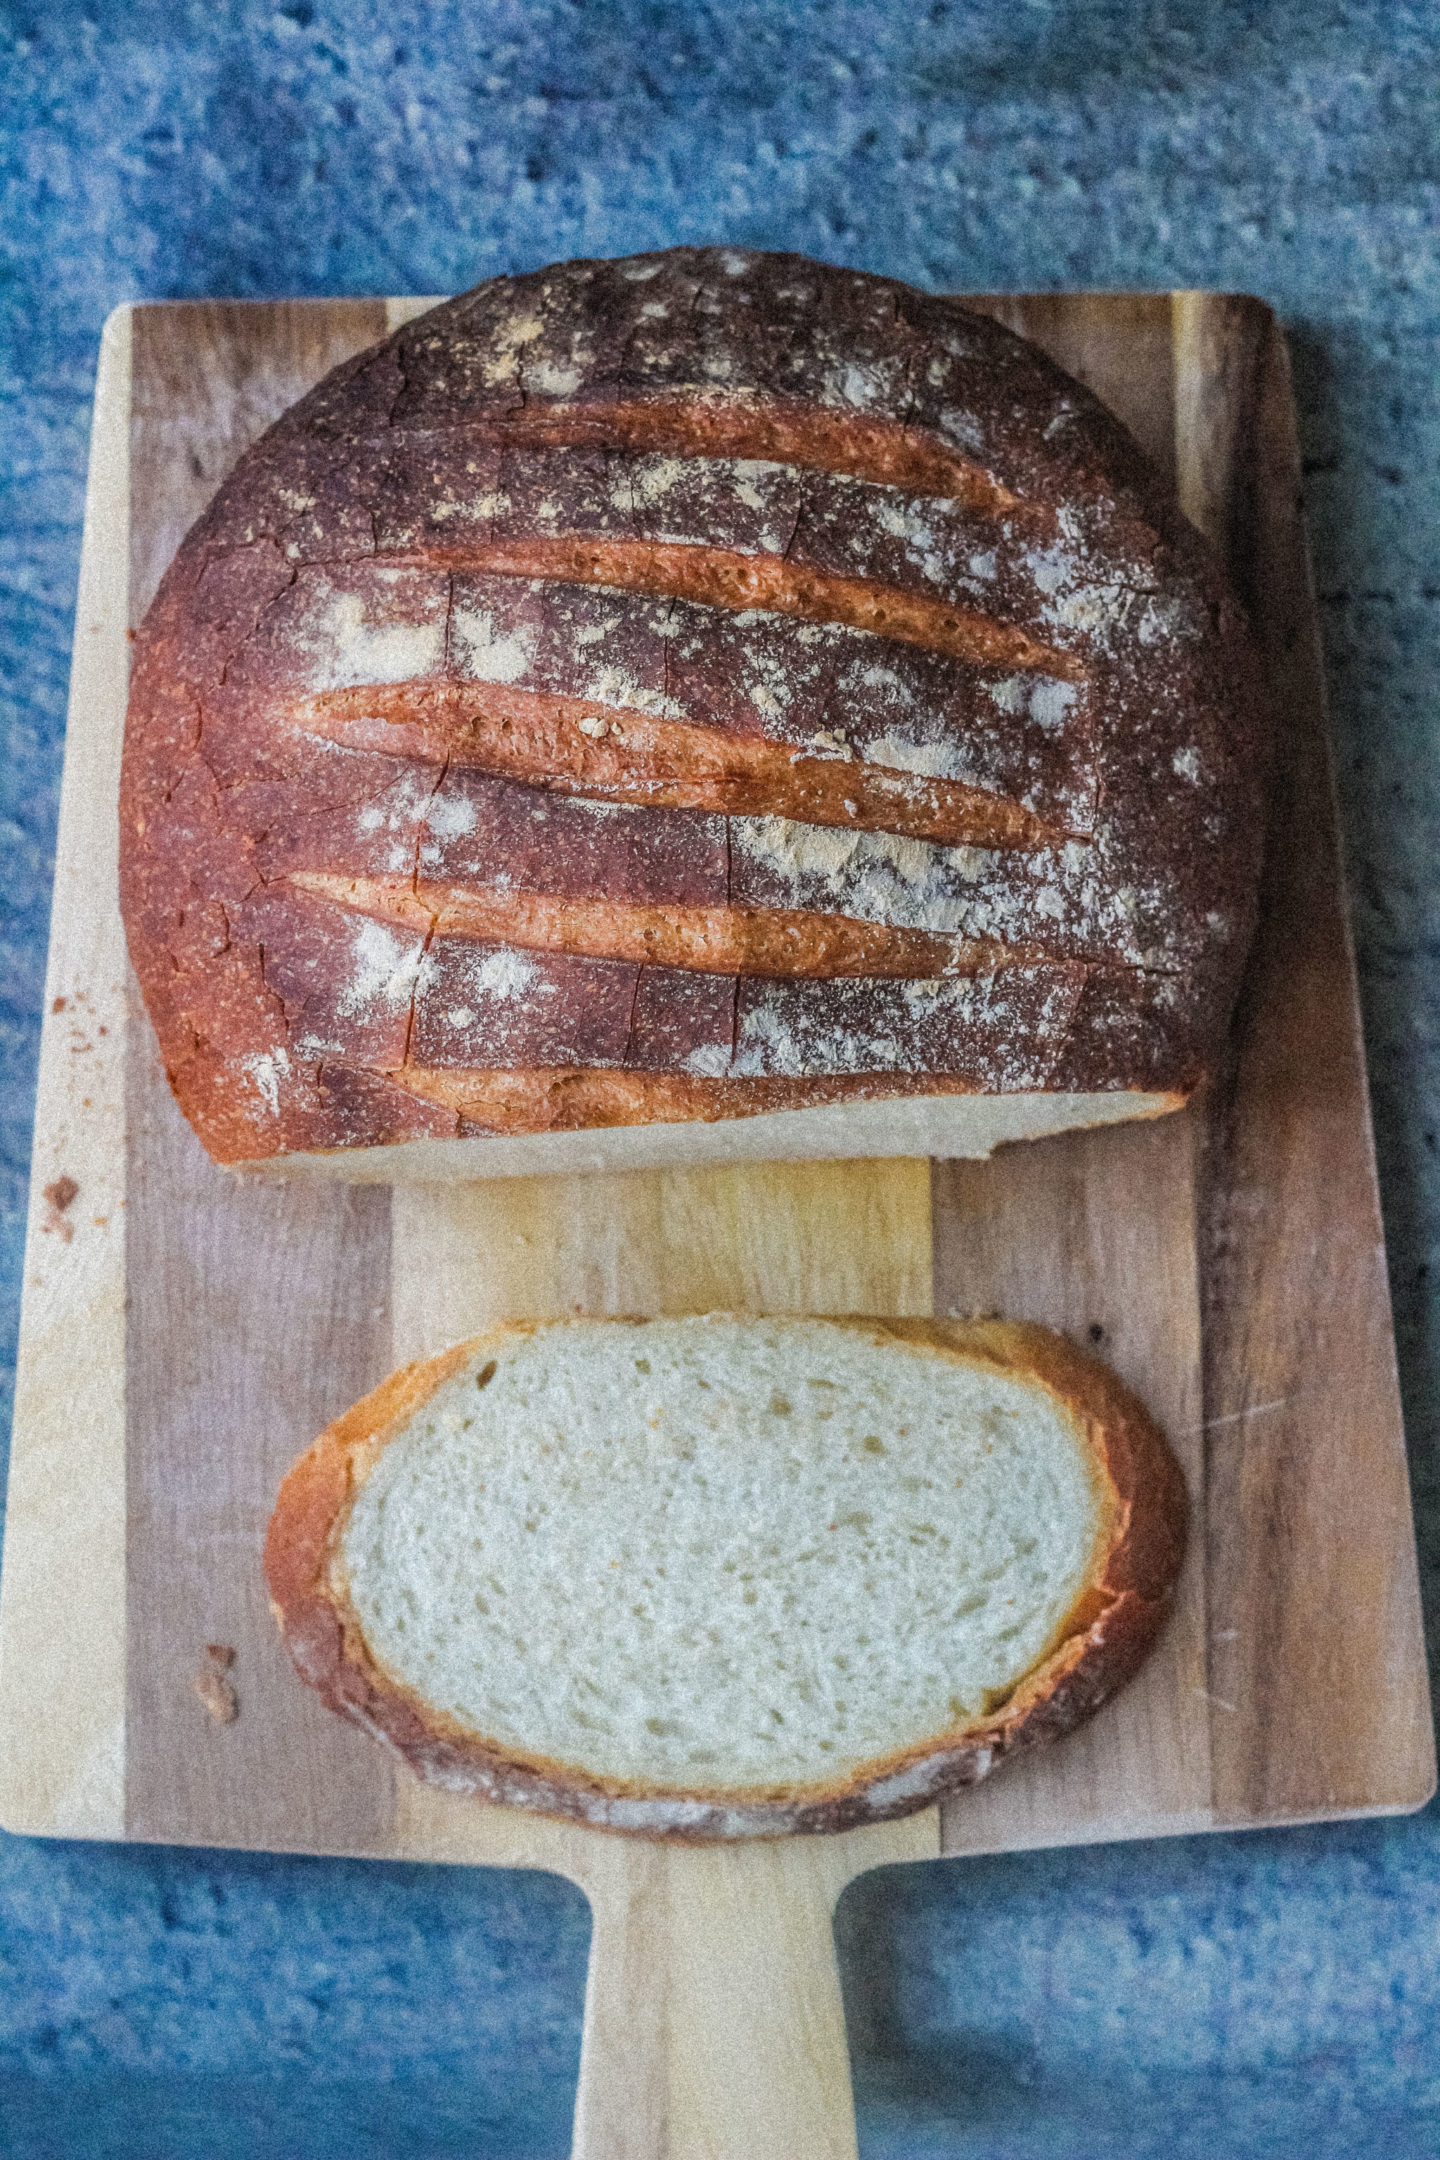
This white cob loaf is made with simple ingredients and no tin is required as it is shaped by hand. A great first bread recipe for beginners!
This post may contain affiliate links. For more information, see my Full Disclosure.
I wanted to start my bread recipe posts with something simple and unintimidating. I say this from experience as a simple white cob loaf was the first bread I attempted when I started baking!
It felt amazing seeing this big, round loaf and knowing I somehow made it! So rest assured, if you are new to bread making this is the perfect beginner’s loaf.
Although it seems like a long-winded process, each stage doesn’t actually take that long. The longest part is waiting for the dough to prove! I find this is a great bake for when I’m home all day and can come back to it in-between doing other things.
Easy cob loaf recipe with simple ingredients
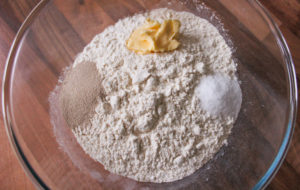
The ingredients for this white cob recipe are so simple and most you should have already. Strong white flour (best for bread), instant yeast, salt, water and some butter. Isn’t it amazing how these few ingredients create this lovely round loaf?
During my recipe testing process, I did try replacing some water with milk. Using milk instead of water in bread making can result in a softer loaf. However (as I found out) it also gives a darker crust so should be baked at a lower temperature…
How to make a cob loaf
I decided that as my goal here was to make a simple, approachable cob recipe, I’d stick with just water.
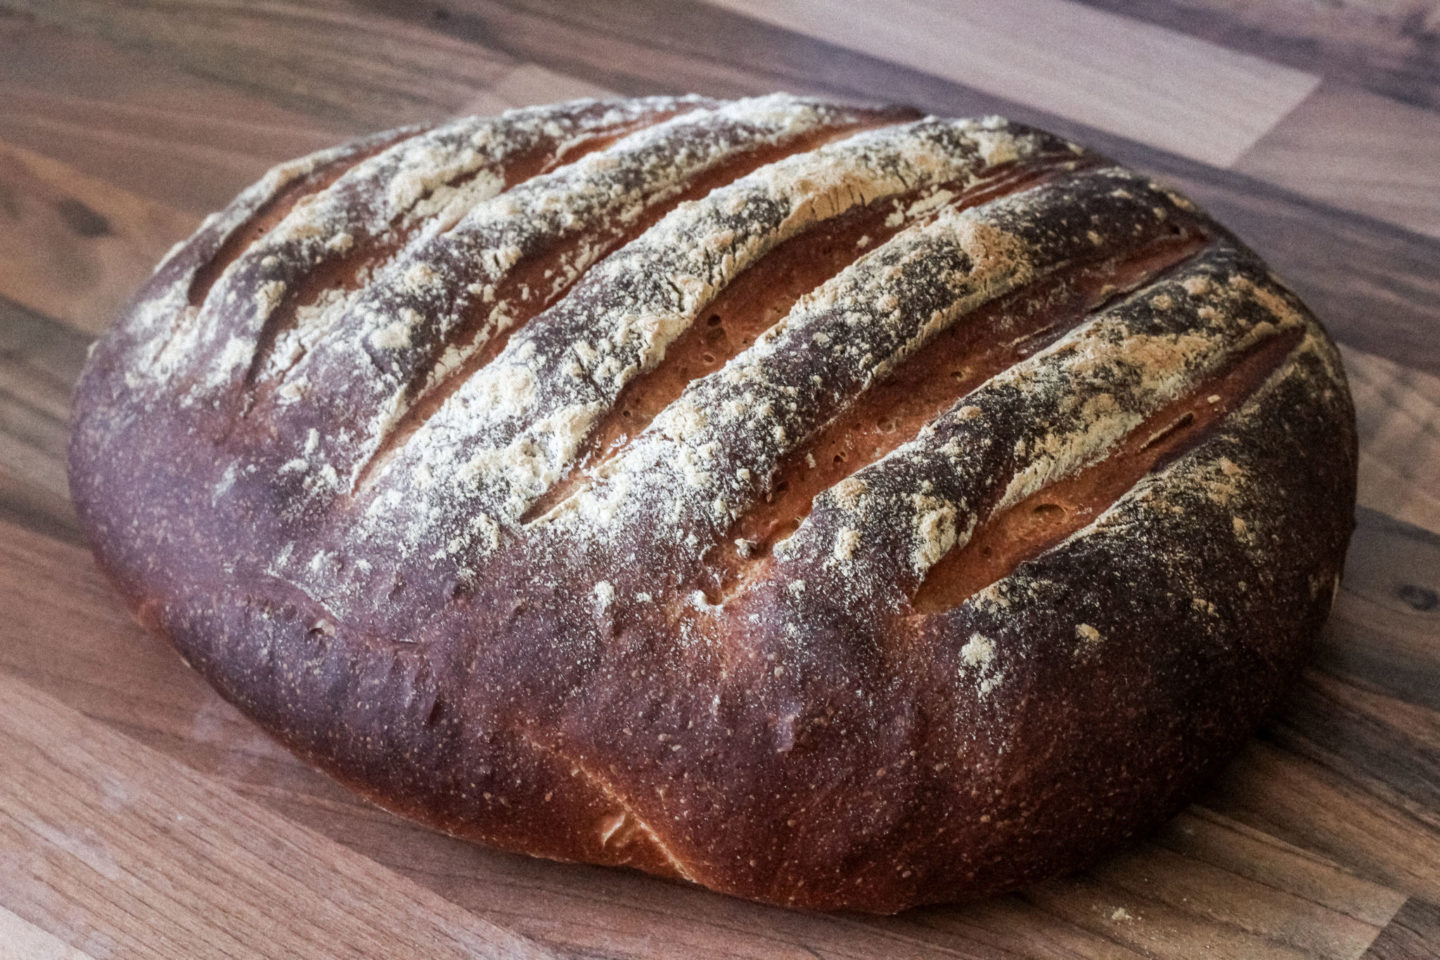
As you can see from the above picture, my first attempt also didn’t have the classic tall, round cob appearance that I wanted. I later found out that this is because I didn’t shape the loaf properly after the first prove. The ball needs to have a firm ‘skin’ to maintain it’s round structure. If not, your dough will sink and spread out when proving.
I found a great tutorial on this by Bake With Jack where I learned how to shape my cob better, resulting in a taller, domed loaf!

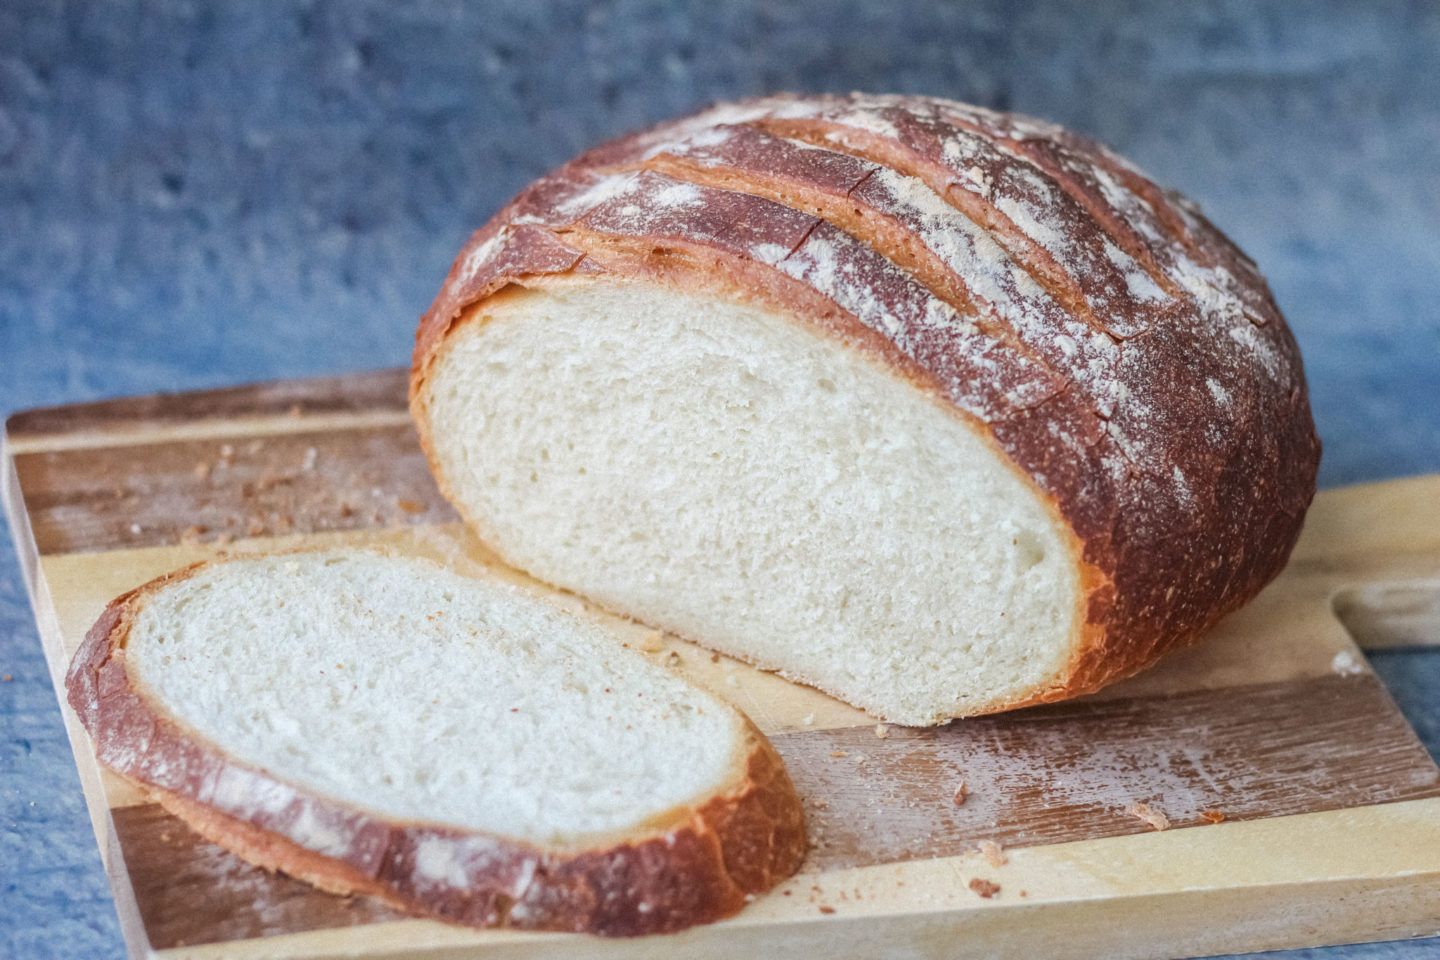
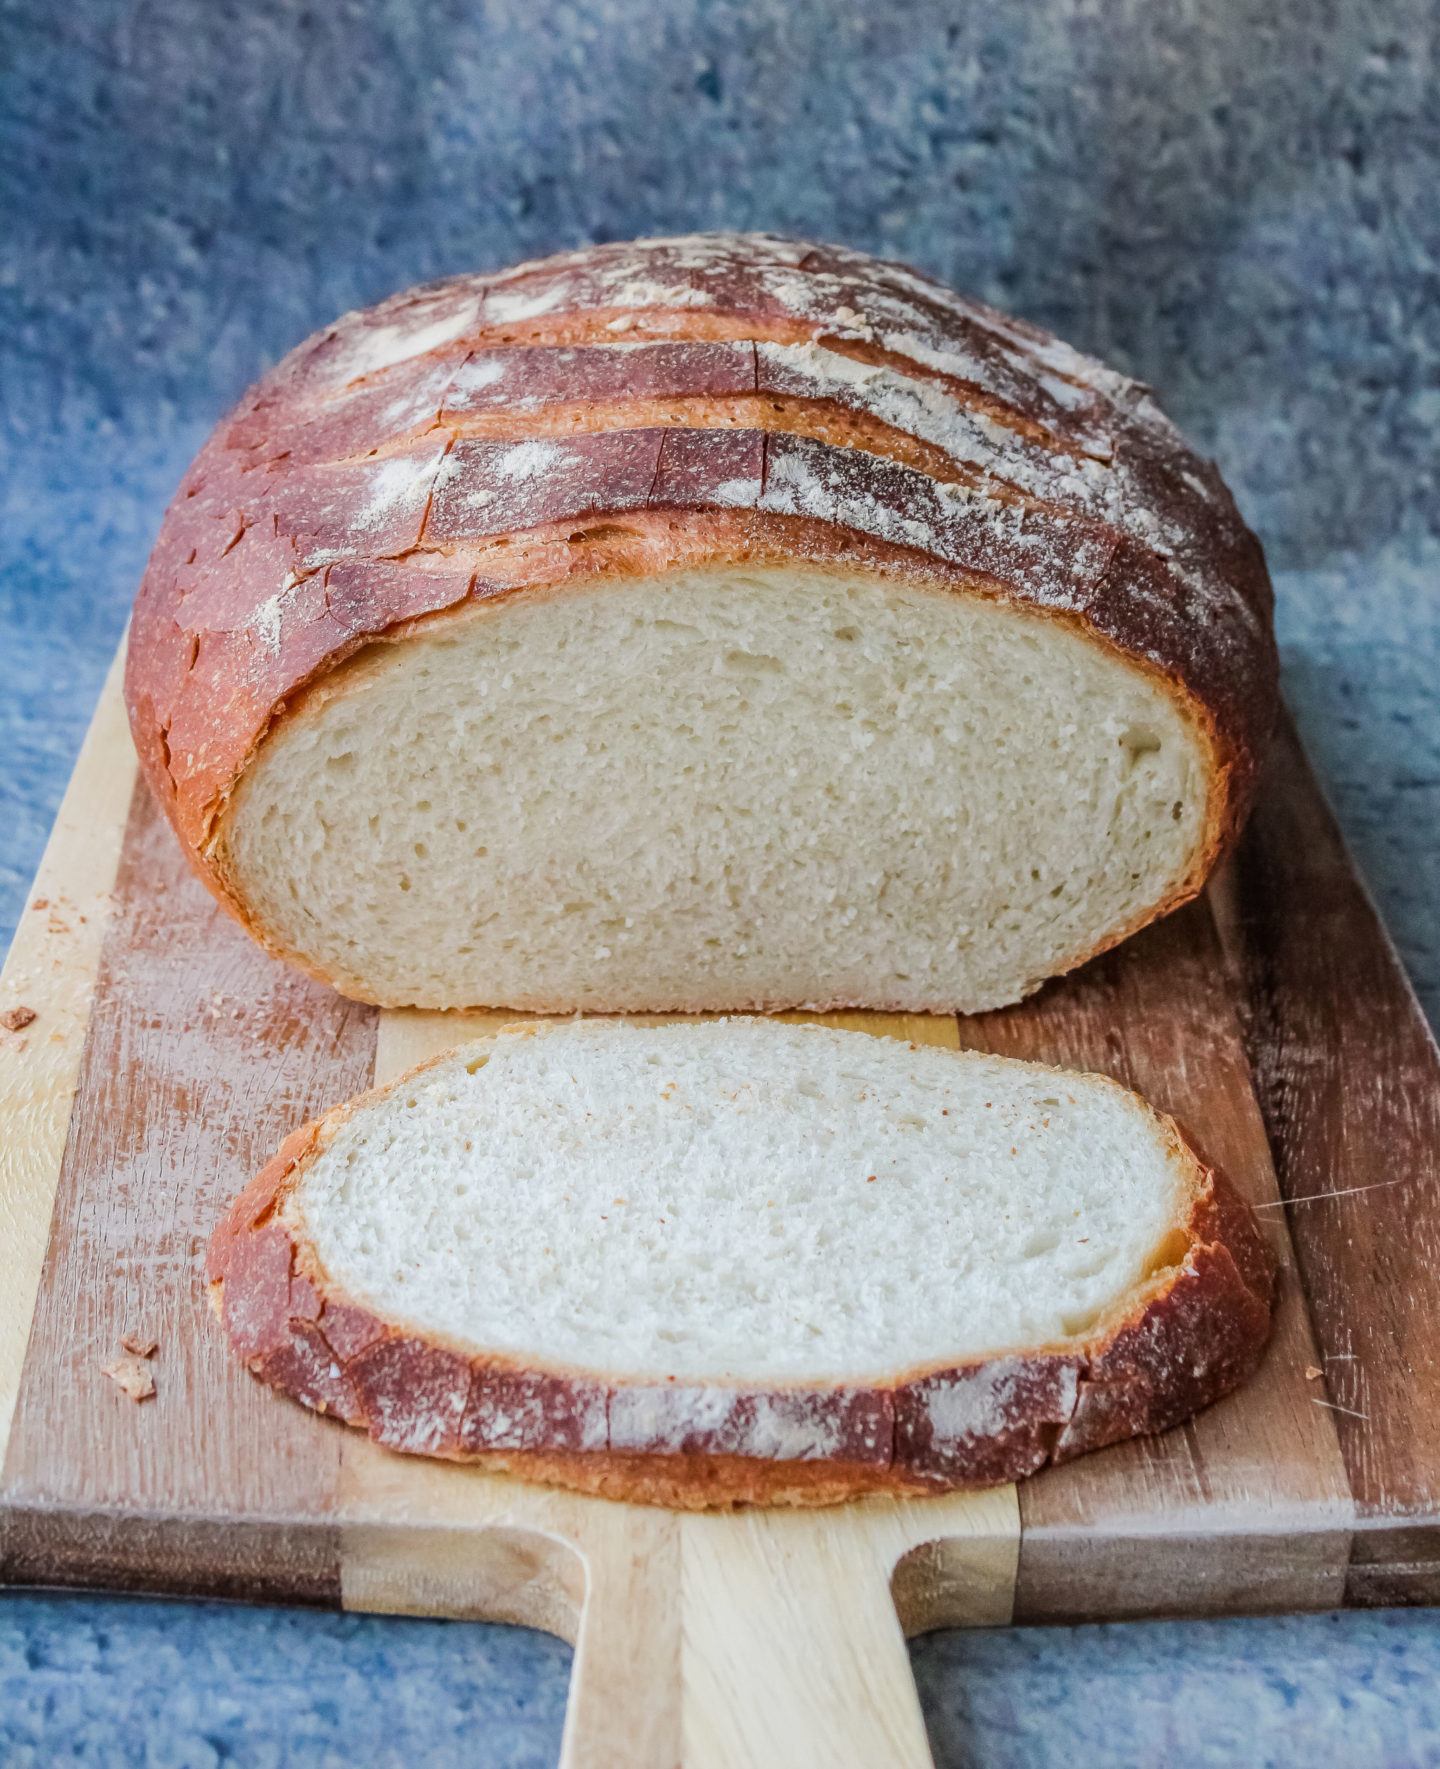
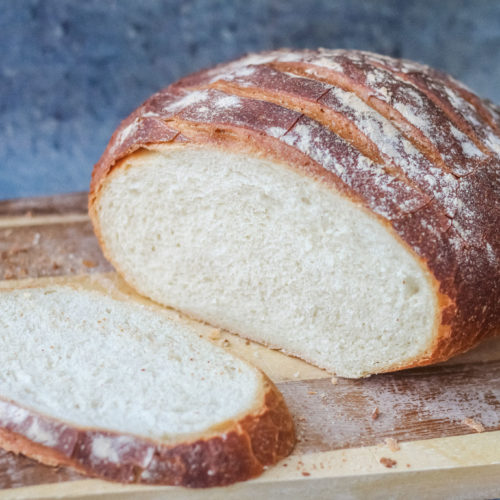
What is the texture like inside a white cob loaf?
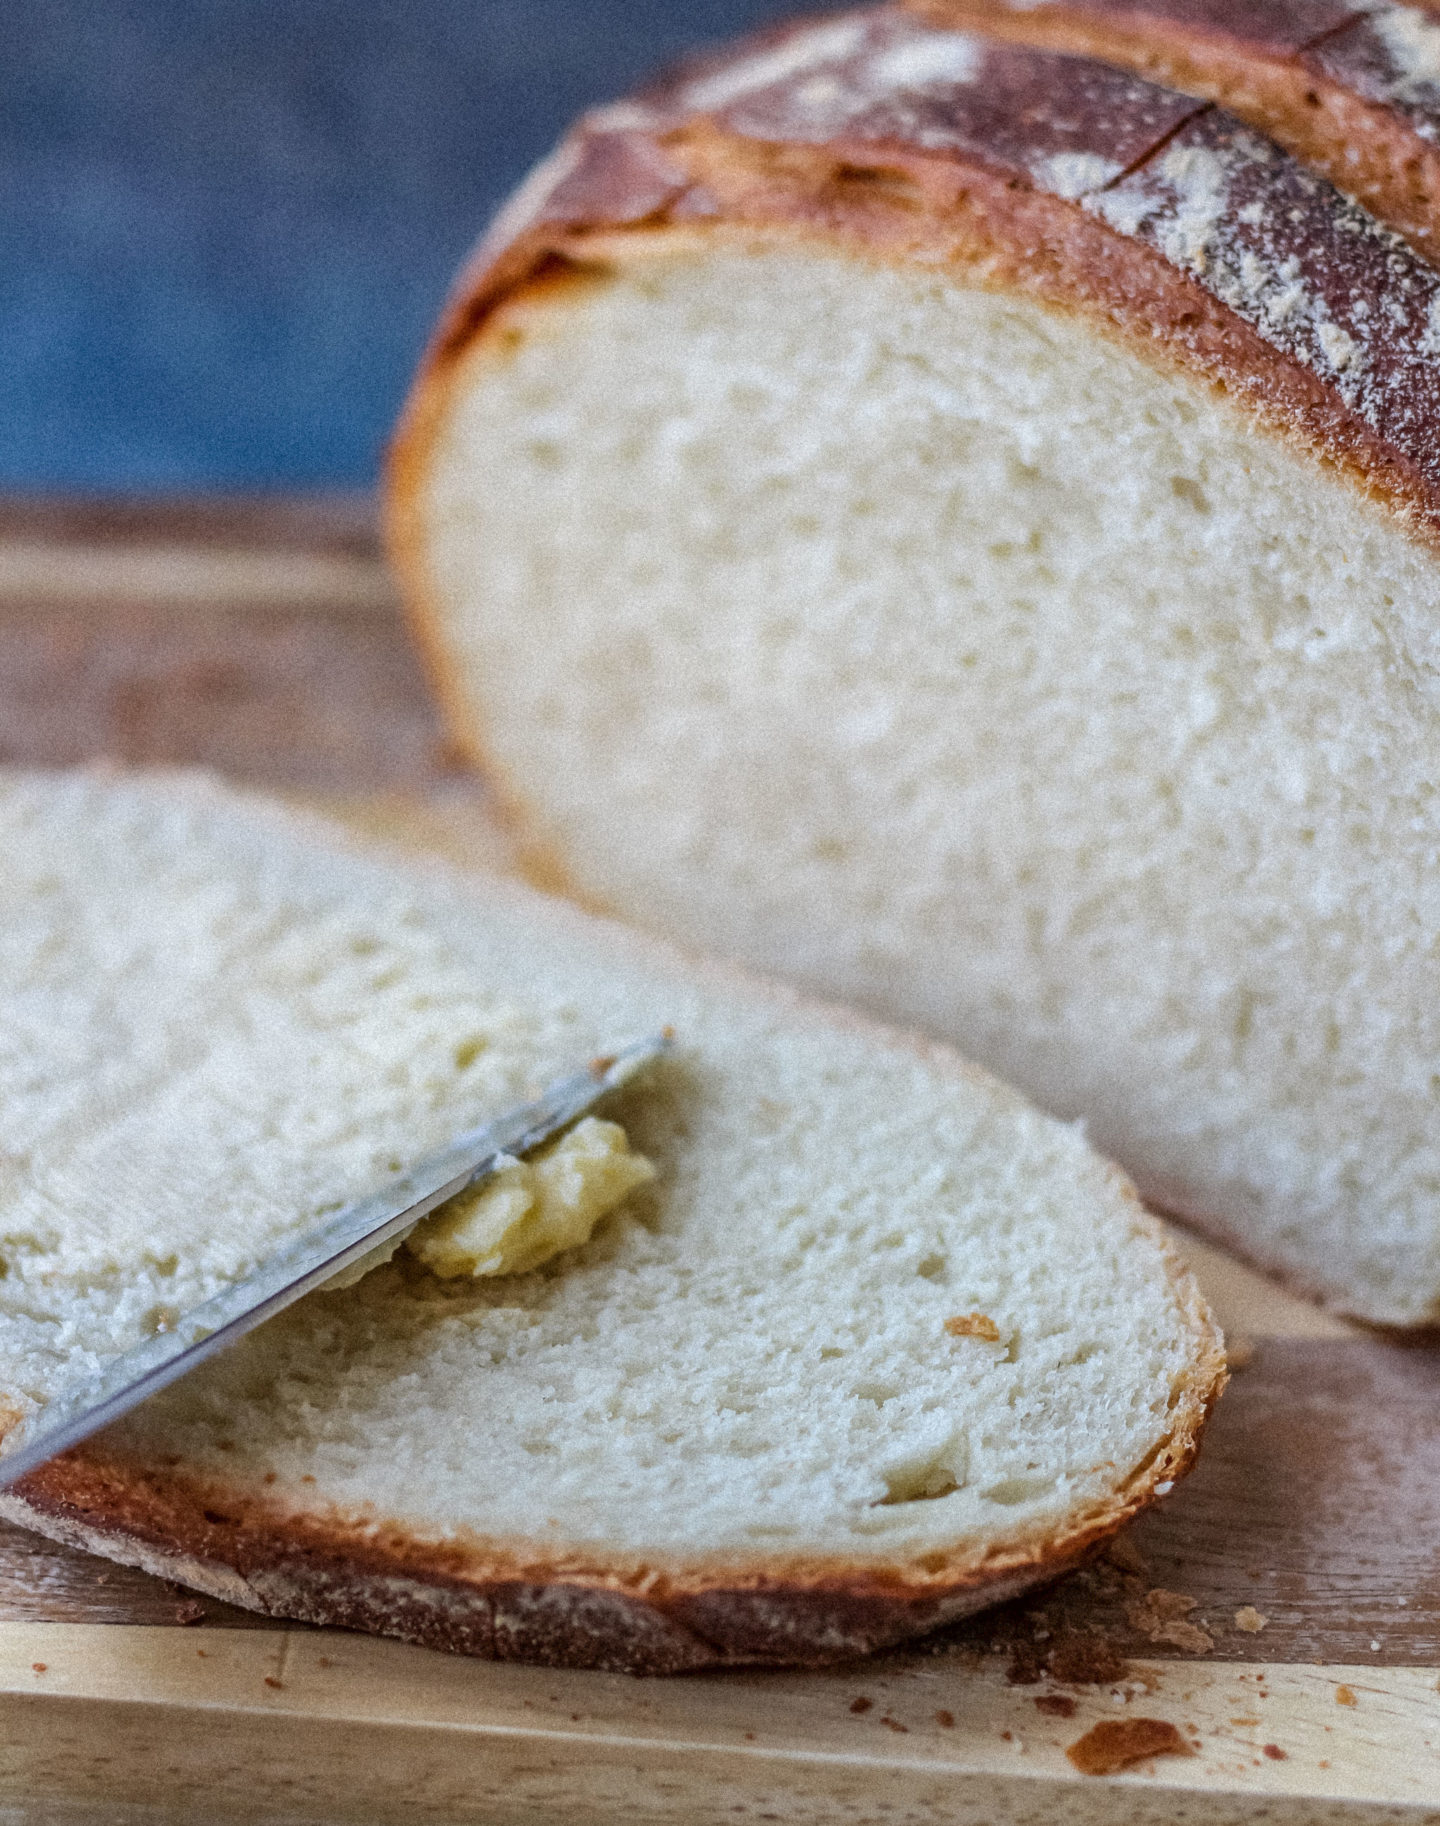
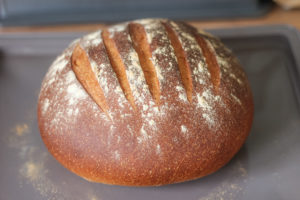
This cob has a close crumb but is still nice and light in texture. It is firm enough to slice easily and has a lovely crunchy crust! My test loaves have been used for sandwiches and dipped in casserole and soup.
Did I mention how amazing it is
(For bread with a different texture that doesn’t contain yeast, check out my Bacon, Cheese and Spring Onion Soda Bread and my Classic Irish Soda Bread. No kneading or proving is required for these recipes so they can be made in under an hour!)
Easy homemade cob loaf recipe
If you’re a new baker or inexperienced in bread making, please have a go as you’ll be so glad you did! It is so satisfying making your own loaf and I’ll talk you through all of the steps with some photos below to help!
Once you’ve tried this simple white cob loaf, why not try my tin loaf version or my delicious Garlic and Rosemary Focaccia!
If you try this recipe I’d love to see! You can show me by tagging me @bakerjoblog or using #bakerjoblog!
Other bread recipes to try:
- Garlic and Rosemary Focaccia
- Bacon, Cheese and Spring Onion Soda Bread
- Simple White Tin Loaf
- Classic Irish Soda Bread
Simple White Cob Loaf
Equipment
- Large bowl
- Roasting tray
- Baking tray
Ingredients
- 480 g strong white flour
- 7 g instant dry yeast
- 9 g salt
- 290 ml water tepid/lukewarm
- 20 g butter softened/room temperature
Instructions
- Add flour to a large bowl. Add the butter, and then the yeast and salt to separate sides of the bowl (so the salt doesn't slow or kill the yeast). Gently start stirring everything together with your hand until just combined.
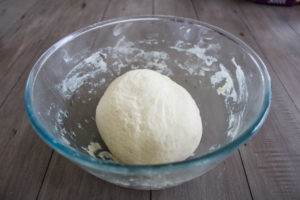
- Pour around 2/3 of the water into the bowl and continue mixing the dough with your hand. Add a little more water, stirring in between additions, until you have a smooth but not soggy dough. You may not need to use all of the water or may need a little more. If you add too much and it becomes soggy sprinkle in a little more flour until you get the correct consistency.

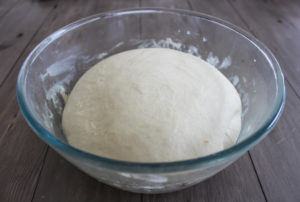
- Pour and spread a little olive oil onto a clean work surface and place the dough on top. I use oil instead of flour to prevent the flour from affecting the dough’s consistency. Knead the dough on this surface for around 10-12 minutes, until the dough has a smooth ‘skin’. Try your best to knead it for this length of time. Lightly oil the same large bowl and place the dough inside. Cover with a clean cloth or cling film and place in a warm place to prove for 1-2 hours (mine takes 1.5 hours in my airing cupboard!). It is sufficiently proved when it has at least doubled in size.
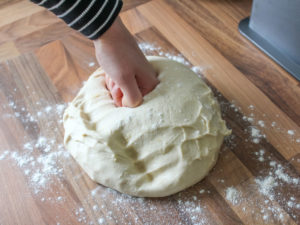
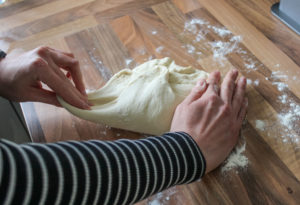
- Lightly flour a work surface and gently tip the dough out onto the surface. Gently ‘punch’ the dough to get rid of the air.
- Now we need to shape the dough into a firm cob shape. Grab an end of the dough, pull it across to the opposite side and press it down into the dough to seal it.

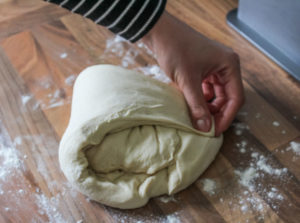
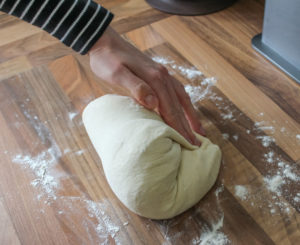
- Turn the dough slightly and repeat this process several times, turning slightly each time.
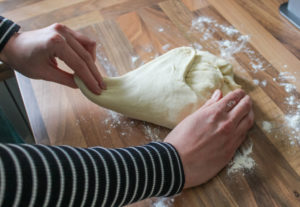
- As you can see each time you do this the dough becomes tighter and firmer, and you aren’t able to pull as much across. This is building the tension it needs to maintain its round shape without spreading.
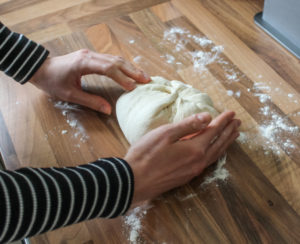
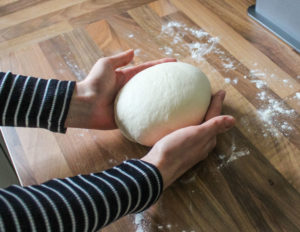
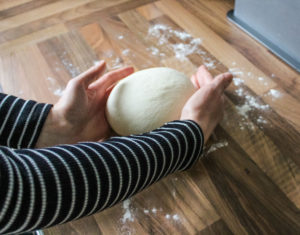
- Now turn it over so all of the fold marks are underneath. You are left with a round, smooth-skinned ball of dough. Place your cupped hands either side of the dough, tucking them under the dough slightly. Now you are going to turn the dough clockwise or anti-clockwise (I go anti-clockwise but it may be because I’m left-handed!). While turning the dough with your hands you also need to tuck your hands underneath, to pull the dough underneath, creating a tighter skin. This means with each turn you’ll lift the dough slightly to tuck your hands under slightly to pull the dough. It’ll make more sense once you start to do it!
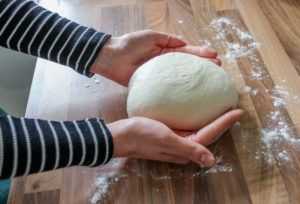
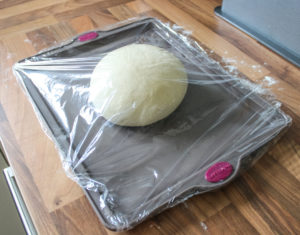
- Once the dough feels firm and holds its shape, place it on your baking tray (silicon or lined with baking paper) and cover gently with a cloth or loose piece of cling film. Leave to rise on this tray for around 1 hour.
- Pre-heat your oven to 230°C/210°C fan and place an empty roasting tray on the lowest shelf/base of the oven to pre-heat.
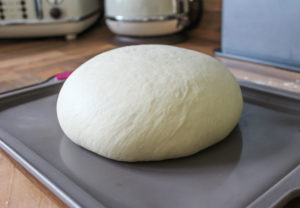
- Once the dough has risen to around double it’s size remove the cling film.
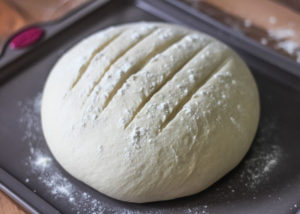
- Dust with a little flour and then using a sharp knife make several incisions across the top of the loaf.
- Add boiled water to the empty pre-heated roasting tray in the oven. This will create steam to give the bread a lovely crust! Do this quickly to avoid losing too much heat from the oven.
- Place the loaf into the oven on the middle shelf and bake for around 30 minutes. You can check if it’s baked by flipping over carefully and tapping the base – it should sound hollow. Place on a wire cooling rack to cool completely.
- Keep bread well covered in a cool place. Best eaten within three days. Enjoy!

All I can say about this cob loaf is WOW! I followed the instructions, I put a timer on for when I was kneading the loaf 👍 I took my time, and when it was ready to bake, in it went, I have never tried steam in the oven before. Keeping fingers crossed I waited on the timer going, wow it looked lovely coming out of the oven. We waited until it had cooled completely and then sliced and buttered a slice each. It was delicious. Thank you for the recipe.
Brilliant for beginners. This is the 4th loaf of bread I’ve ever made and it turned out amazing. I recommend mixing with a spoon or something where the recipe says to use your hands bc my dough started off quite sticky and I couldn’t get it off my hands. Otherwise, no issues.
I can’t imagine there’s any reason this couldn’t be baked in a cast iron bread cloche??
Love thus recipe. Turns out perfect and delicious everytime. Never had any success before with bread. This one is a keeper. Thank you!
Have baked this twice now. First time results very nice. I used Dutch oven 20min lid on and 10min lid off for a soft crust. I kneaded for 15min which was a challenge but got good results. Today I discovered a trick with the butter which I smeared around my mixing bowl in a thin film. This made it easier to work through evenly and also I was left with a nice clean proofing bowl. I also tried Jack’s tip of saving some of yesterday’s dough in fridge and I used 25ml of lime juice and the rest of liquid was pasta water. Results were best yet 😀. Thanks for sharing your awesome recipe Jo
Bread and I haven’t worked before, until I tried this recipe and every cob I’ve made since has been delicious, my husband requests it at least once a week. I’d love to make this for a vegan friend. Would I just substitute 20g butter for oil? Any ideas? Thank you
wow ! just made this and it tastes beautiful. thanks very much for taking the time to share this recipe, will definitely be a firm favourite in our house.
Just made this loaf, with my flour will take the water and salt content down a little, a personal choice.
but my first attempt looks amazing i am so happy with it, all cooling down waiting to be sliced.
Update, just tried a slice.
Amazing crusty, full of flavour this is my go to bread from now on
Author
Thanks for your feedback Phil, so happy to hear this will be your go-to bread recipe!
Christmas wonder-bread.
Spinach dip a couple of times and then used to complement a brisket.
The gathered family demanded more cob loaf so it became a family event every couple of days.
Great receipt -worked every time.
Author
Oooh this sounds so delicious!
Brilliant recipe, bread turns out lovely every time!! I would upload photos of the recent one I made. Thank you Jo have already recommended to a few of my friends 🤩
Author
Hi Angela,
This comment was so lovely to read, thank you! I’m glad you like the recipe so much, and really appreciate your support 😊
Hi! I’m new to baking bread, but the first few times this recipe turned out amazing! Recently though, it starts fine, rises great in the bowl, and then, after I’ve shaped the dough the same as I always have, it flattens out on the pan. Could you tell me why this might be? The flour I am using is the same as always, so I’m quite confused! It’s a wonderful recipe when I can make it work!
Author
Hi Hannah,
Sorry to hear it’s not working for you recently – that’s odd! I assume your technique of shaping is good if it’s come out well in the past, but my first suggestion is to make sure you’re shaping the cob into a nice, tight ball which prevents it from spreading during the second proof. I’m wondering whether it could be your yeast; my tin of yeast says it needs to be used within 4 months of opening, so that might well be the problem. Otherwise, make sure you’re not adding a little too much water to the dough as that prevents it from rising and holding its shape so well.
Hope this helps 🙂
I have used this recipe a number of times and it has never let me down. Lovey tasting bread time and time again. Stumbled across this website by complete accident too but I am so glad that I did. Fantastic!
Author
Hi Steve,
Thank you so much for your feedback, that means a lot to me! And I’m glad you found my site – welcome! 😊
My wife found this recipe on line, and I must say it’s the best for making a cob loaf. I now make it with a mixture of strong white flower and whole meal flower and add a mixture of seeds.
Author
Hi Martin,
Thanks so much for your feedback, and I’m glad you’re enjoying experimenting with different variations!
Hi jo, I am new to baking bread.made my first one yesterday.unfortunately it wasn’t a huge success, I done everything the recipe asked.the outside of the bread looked amazing lovely shape and crusty, but wasn’t sure about the inside . it looked a bit heavy and slightly damp, it tasted okay. I noticed one of your comments seemed to have had the same problem as me.I would be very grateful if you could point me in the right direction to making better bread.
Thank you
Author
Hi Marianne,
Firstly, congratulations on making your first loaf! It is a learning process and I’ve made some loaves that sound similar to yours when I was learning! I’m sorry that your loaf didn’t turn out as it should have, but when this happened to another reader I suggested the following:
Underproving could definitely be the cause of a heavy/dense dough as you suggested. If you don’t have an airing cupboard don’t worry, just put the bowl in your warmest room away from any draughts. Proving time can vary anywhere from 1-2 hours depending on the conditions. You’ll know it’s proved enough when it has at least doubled in size – I often take a photo of the dough on my phone before I prove it so I can compare after proving!
Another cause may be that the dough was slightly too sticky/wet before proving, as this can weight it down. Make sure the dough is soft and smooth, not sticking to the counter or your hands at all.
I hope these suggestions help if you give it another try!
Iv been baking bread for a while now with varied success but this recipe is by far the best.great rise,gorgeous crust and the taste,BELISIMO!!
Thank you so much.
Author
Thank you so much, I’m so glad you love it! 😊
Hi Jo,
This recipe is absolutely incredible! I made it last week and am hoping to do another one tomorrow! I just wanted to ask whether this recipe is easily doubled?
Thanks so much X
Author
Hi Sophie,
I’ve not personally doubled it before but I’ve looked into it and it seems it is OK to simply double all of the ingredients. However, I imagine you might need to knead the dough a little longer, and that it will probably be more difficult to knead being twice as large! Maybe it would be better to make each batch of dough separately, to feel more confident you’ll get good results?
Good luck and let me know how it goes!
Hi, before i am about to start making this bread and have few quick questions. Do i mix all the dry ingredients yeast flour and salt together before adding lukewarm water into well of mixed dry ingredients? also can i use dough hook in mixer to kneed instead of by hand.
Thanks
Ann
Author
Hi Ann,
Yes you can mix them briefly with your hand before adding the water to make sure they’re well combined. And you can definitely use your dough hook instead, though the dough may be ready a little quicker than when kneading it by hand so just check on it every few minutes until the dough is the right consistency.
Hope this helps, let me know how it goes 🙂 x
So happy I found your recipe, I normally use my mixer but decided to follow your instructions I am now the proud owner of the best crusty cob I have ever made, thank you 😀😀
Author
Hi Kath,
Thank you so much! I’m so glad you made your best cob yet using this recipe! 😊
Hi Jo,
Have used this recipe for the last 4 cobs I’ve made! Absolutely love it!!! Makes for a really beautiful bread!
I’m wondering if you could help me, though – the last couple I have made have cracked while cooling! Is there a way to avoid this happening? 😊
Author
Hi Ciara,
Firstly thank you for your lovely feedback – I’m so happy you’ve made this cob 4 times!!
As for the cracking, my cobs crack a little too as they cool. When recipe testing I tried to research why and the best answer I found was that the bread contracts as it cools, so the contraction causes these fine hairline cracks. I personally like the cracks and think it makes it look rustic! However, you could maybe experiment by either baking it at a slightly lower temperature for a little longer or try baking it without the steam tip I recommend (as the steams helps to create this thicker crust)!
I hope this helps, thanks again for your comment 😊
Thanks for the fab recipe! Baking almost every day. Complete beginner but nurturing a starter now and hopefully moving on to sourdough recipes. Will keep making this recipe too as really adaptable. ❤
Author
Hi Gilli,
Thank you for your comment – I’m so happy you enjoyed this recipe so much, that means a lot! I’m hoping to try sourdough soon too so I may have a recipe on the blog in the next few months 😊
Thank you Baker Jo for this fab recipe, tried many before but definitely find this one the best. Images were a great help too. I finally got around to using my Cloche to bake it in (had been sat on my shelf since last birthday!) and the results were amazing.
Author
Hi Simon,
I’m so happy you’ve had such successful results using my recipe! And I’m thrilled you find my step by step photos useful; my goal is to make all of my recipes as easy to follow as possible 🙂
Thanks for your feedback!
Just love this recipe. I’m learning breadmaking in lockdown and happened upon this recipe after a google search so tried it out. Just finished attempt no. 3 and each time it’s better than the last.
The bread is tasty, the method easy to follow .. what more could you ask for? Thanks
Author
Wow Carolyn, what a lovely comment! 🙂Thank you, that means a lot to me and I’m so happy you find the method easy to follow!
Hi, silly question . What is string white flour? Is it all purpose flour or self raising flour
Author
Hi Nikila, that’s not a silly question at all! Strong white flour is flour with a slightly higher level of protein, which is better for making bread to develop the gluten. However, if you can only get your hands on plain white flour that will work, it just may not rise quite so well, but only slightly 🙂 hope this helps!
Hello! Have tried this recipe a few times and turns out amazing each time, thank you! Just wondering if it would work leaving it overnight for the first rise? As would like to be able to bake it fresh in the morning for breakfast, thank you!
Author
Hi Hannah, I’m so glad you like this recipe enough to make it several times!
I’ve not personally tried proving this bread overnight so can’t promise this would work, though I would suggest keeping it in the fridge rather than a warm environment. This would slow down the proving process to reduce the risk of overproving it.
Let me know how it goes if you try it!
Hi, Jo.
I’ve been baking similar delicious cobs to your recipe for years now (more so since I moved to Sweden) and I can answer the question posed by Hannah. I saw an article by a baker a few years ago that explained what happens to the water and flour in a dough when left overnight in a fridge for the initial rise. An enzyme reaction called an “autolyse” takes place. This does more than anything else to improve the flavour of the bread. Make the dough one day then bring it back to room temperature the next day after taking it out of the fridge; and following on with the recipe after that. You’ll achieve a similar product but the increase in flavour is wonderful. I would advise anyone using your recipe to add this simple extra stage (the water in the recipe is better being cold) and then marvel at the increase in flavour. Thanks for letting me comment: I love your bread.
Author
Thanks so much for explaining this Alan – I will definitely give this method a try soon!
Great recipe and instructions thanks Jo. Had tried other breads during lockdown but this was the only one that turned out perfect. Only problem was cutting it in nice slices. Need to sneak this into a store with cutting machine 😆 have you made this recipe but making small rolls? Could this be done by keeping all ingredients same making 6 or 8 rolls and shortening the baking time??
Author
Thanks Lisa! So glad you found my instructions easy to follow 🙂
I haven’t tried it as rolls yet but it’s on my to-do list! Your suggestion for adjusting baking time sounds good though – maybe to around 20 mins? I’d probably try proving and baking them in a tray bake tin too to keep them more uniform. If you try it let me know how it goes!
First time ever baking bread! It was a success. Thanks so much for such an easy recipe.
Author
Hi Niki, I’m so glad you found my recipe easy to follow as a first time bread maker! Thanks for your comment 😊
Baked this cob today – my first ever freehand bread. Really chuffed with the result. Followed the recipe and method to the t and it’s turned out perfectly.
Small question though – would reducing the salt slightly affect the bake at all? I could probably take it with a bit less salt in the mix if possible.
Author
Hi Nicola, thanks for your message! I’m so glad you liked your cob!
And yes you can absolutely reduce the salt as it’s just there for flavour 🙂
This recipe is the best I’ve made full stop . I’ve done this a few times in lockdown and it’s always turned out brilliant. I gave one to a neighbour the other day (left on doorstep) and they were amazed it was homemade .
Author
I’m so happy reading this Andy – thank you so much 🙂 I hope you get the chance to make it again in the future!
WOW… just wow…
Just lifted my loaf out the oven and I think it’s the best cob I’ve ever made.. your recipe was easy and straightforward to follow. I’ve been making bread for about 20 yrs and still love trying new recipes, this one will be my favorite go to recipe for the next 20 yrs . Thanks for sharing it with us
Author
Thank you so much Michelle, your comments have made my day 😊 I’m so happy you found my recipe so easy to follow, it means a lot to me.
Thanks so much for your support! 💜
Made today and turned out so good!! (If I do say so myself). You would not know it was home made, great crust and so easy. I cooked for slightly longer (35mins?). Have recommended the recipe to my family and both dad and brother are already on their second prove! Will definitely be making again.
Author
Hi Jess,
I’m so happy reading this! I’m really glad you found it so easy to make and that your family are having a go too!
I mad this loaf and it seemed OK I wasn’t sure about the gas setting so looked it up .The loaf looked great but it was heavy and doughy with a slight aftertaste it looked a bit underdone but wondered if I’d proved it enough I don’t have an airing cupboard so any tips for proving
Author
Hi Joan,
Sorry your loaf didn’t turn out as it should have. Underproving could definitely be the cause of a heavy/dense dough as you suggested. If you don’t have an airing cupboard don’t worry, just put the bowl in your warmest room away from any draughts. Proving time can vary anywhere from 1-2 hours depending on the conditions. You’ll know it’s proved enough when it has at least doubled in size – I often take a photo of the dough on my phone before I prove it so I can compare after proving!
Another cause may be that the dough was slightly too sticky/wet before proving, as this can weight it down. Make sure the dough is soft and smooth, not sticking to the counter or your hands at all.
I hope these suggestions help if you give it another try!
I made this today, my cob loaf looks awesome!. Thank you for the great step by step instructions. Will wait till morning before I have a slice 😊
Author
I’m so glad you found my instructions helpful, and hope you enjoy when you try it in the morning! 🙂
Made this today, delighted with the results, it was delicious, thanks so much.
Author
No problem, I’m so glad you enjoyed it! 😊
My loaf turned out well although it didn’t double in size when left to rise. This may be because when I added the water to the flour (butter, salt and yeast), some of it mixed with the salt and then spread round to the yeast (all in a matter of seconds!). I put a spoon I’m the way so it didn’t mix with all of the yeast. Do you have a tip for adding the water? If the salt slows (or kills) the yeast, how do you prevent this when adding the water? Adding boiling water to a pre-heated baking tray was a great tip – my loaf had a perfect crust! Thanks for the recipe – not the quickest but definitely worth the wait!
Author
Hi Ciar, thanks for the question. You could make a well in the middle of the flour to pour the water into, then slowly stir it together. Another reason it may not have risen enough is if it didn’t prove for long enough. It can take around 1-2 hours, maybe longer. It helps to leave it in a warm environment; I put mine in my airing cupboard and that usually takes around 1.5 hours to rise.
Another factor which may have affected the prove is if the dough was a little too wet or sticky before leaving to prove. It should be soft, smooth and not sticky before proving.
I hope this helps a little, and I’m glad you agree that the steam helps to create a lovely crust! I hope if you try it again you have more luck next time 😊 thanks for commenting!
Made this cob today, absolutely lovely, just as good if not better than the M&S usual!
Author
So glad you really enjoyed it Mark! 😊
I have never been able to bake decent bread until this recipe it was fantastic I could have bought it from Marks and Sparks. Thank you will be making this often
Author
Hi Jan,
What a lovely comment, thank you so much! I love that this recipe worked for you and that you’ll feel confident making it again in the future 😊
I haven’t baked bread for years but it’s lockdown and I have flour. Followed this to the letter and it is brilliant. I am married to one of the fussiest men in earth and he can’t stop eating it. Thank you
Author
Hi Karen,
I’m so glad that you and your husband enjoyed this! Especially if your husband is usually a difficult one to please :p
Thanks and hope you get a chance to make it again! xx
Hi can you tell me how much fresh Yeast I would need for this and how you’d substitute it in?
Author
Hi Evie,
Thanks for the question – I’ve not personally used fresh yeast before but after doing some reading up on this, you would need to use around 17.5g fresh yeast (instead of the 9g dry instant yeast). Then I’d recommend pouring around half of the water in my recipe into a bowl, add the fresh yeast to this bowl. Add a pinch of sugar to the water (this helps to activate the yeast), stir the water and leave for around 10 minutes. Once you see little bubbles forming on top of the water, the yeast is ready to use! Then carry on with my recipe as normal – pour all of this water-yeast mixture into the bowl with the flour and then use as much of the leftover water as needed until the dough comes together.
I hope this makes sense! Good luck and let me know how it goes 🙂 xxx
Thank you so much this worked a treat! So appreciate you taking the time to work it out. My favourite bread recipe and always my go to! X
Author
Thank you Evie, this comment means a lot! 😊
I live in North Bellmore NY, yea…that NY. As we quarantined our selves for the past 3 weeks, we are experimenting with various recipe and boy does this recipe stand out.
Wow!!! What a fantastic recipe. My wife and 6 year daughter ate the entire loaf in one sitting. The only difference I made was I baked at 430 degrees Fahrenheit and it came out awesome. But think that the our convection runs a bit hotter. Either way,
2 thumbs up!!!!
Author
Hi Vinny,
Thanks for the great review, it means a lot! 🙂
Loved the bread, I live in S.C. , the U.S. Do you have any other recipes for bread or rolls, I really like the bread so much , that I would like to try your other recipes.
Author
Hi Shirley,
Wow I’m so happy that you enjoyed my bread so much! I do have a soda bread recipe on my blog too, which is a really easy quick bread to make. I’m also about to start working on a new whole wheat seeded loaf, so if you sign up to receive my recipes by email you’ll know as soon as it’s been published 🙂
Thanks again for your support!
Jo … complete novice at bread making! You’ve made this do easy Thank you!
Turned out tremendously well. Will definitely be making this again and again 👍😁
Author
Aww Charlie this comment has made my day! I’m so glad you found the recipe easy to follow and feel more confident with bread making now 😊
Is the bread placed right on the rack inside oven to bake?
Author
Hi Carol, you place the loaf onto a lined/silicon baking tray first then into the oven.
Let me know how you get on 🙂
could you possible giev me the recipe in cups etc
Author
Hi Judith, I’m sorry I don’t use cup measurements but there are a lot of websites with conversion charts/calculators that you could use! Hope this helps 🙂
I mad this. Bread once and love it , now I have my second one in the works.
Author
So happy you liked it Hilda! Thanks for the great feedback 😊