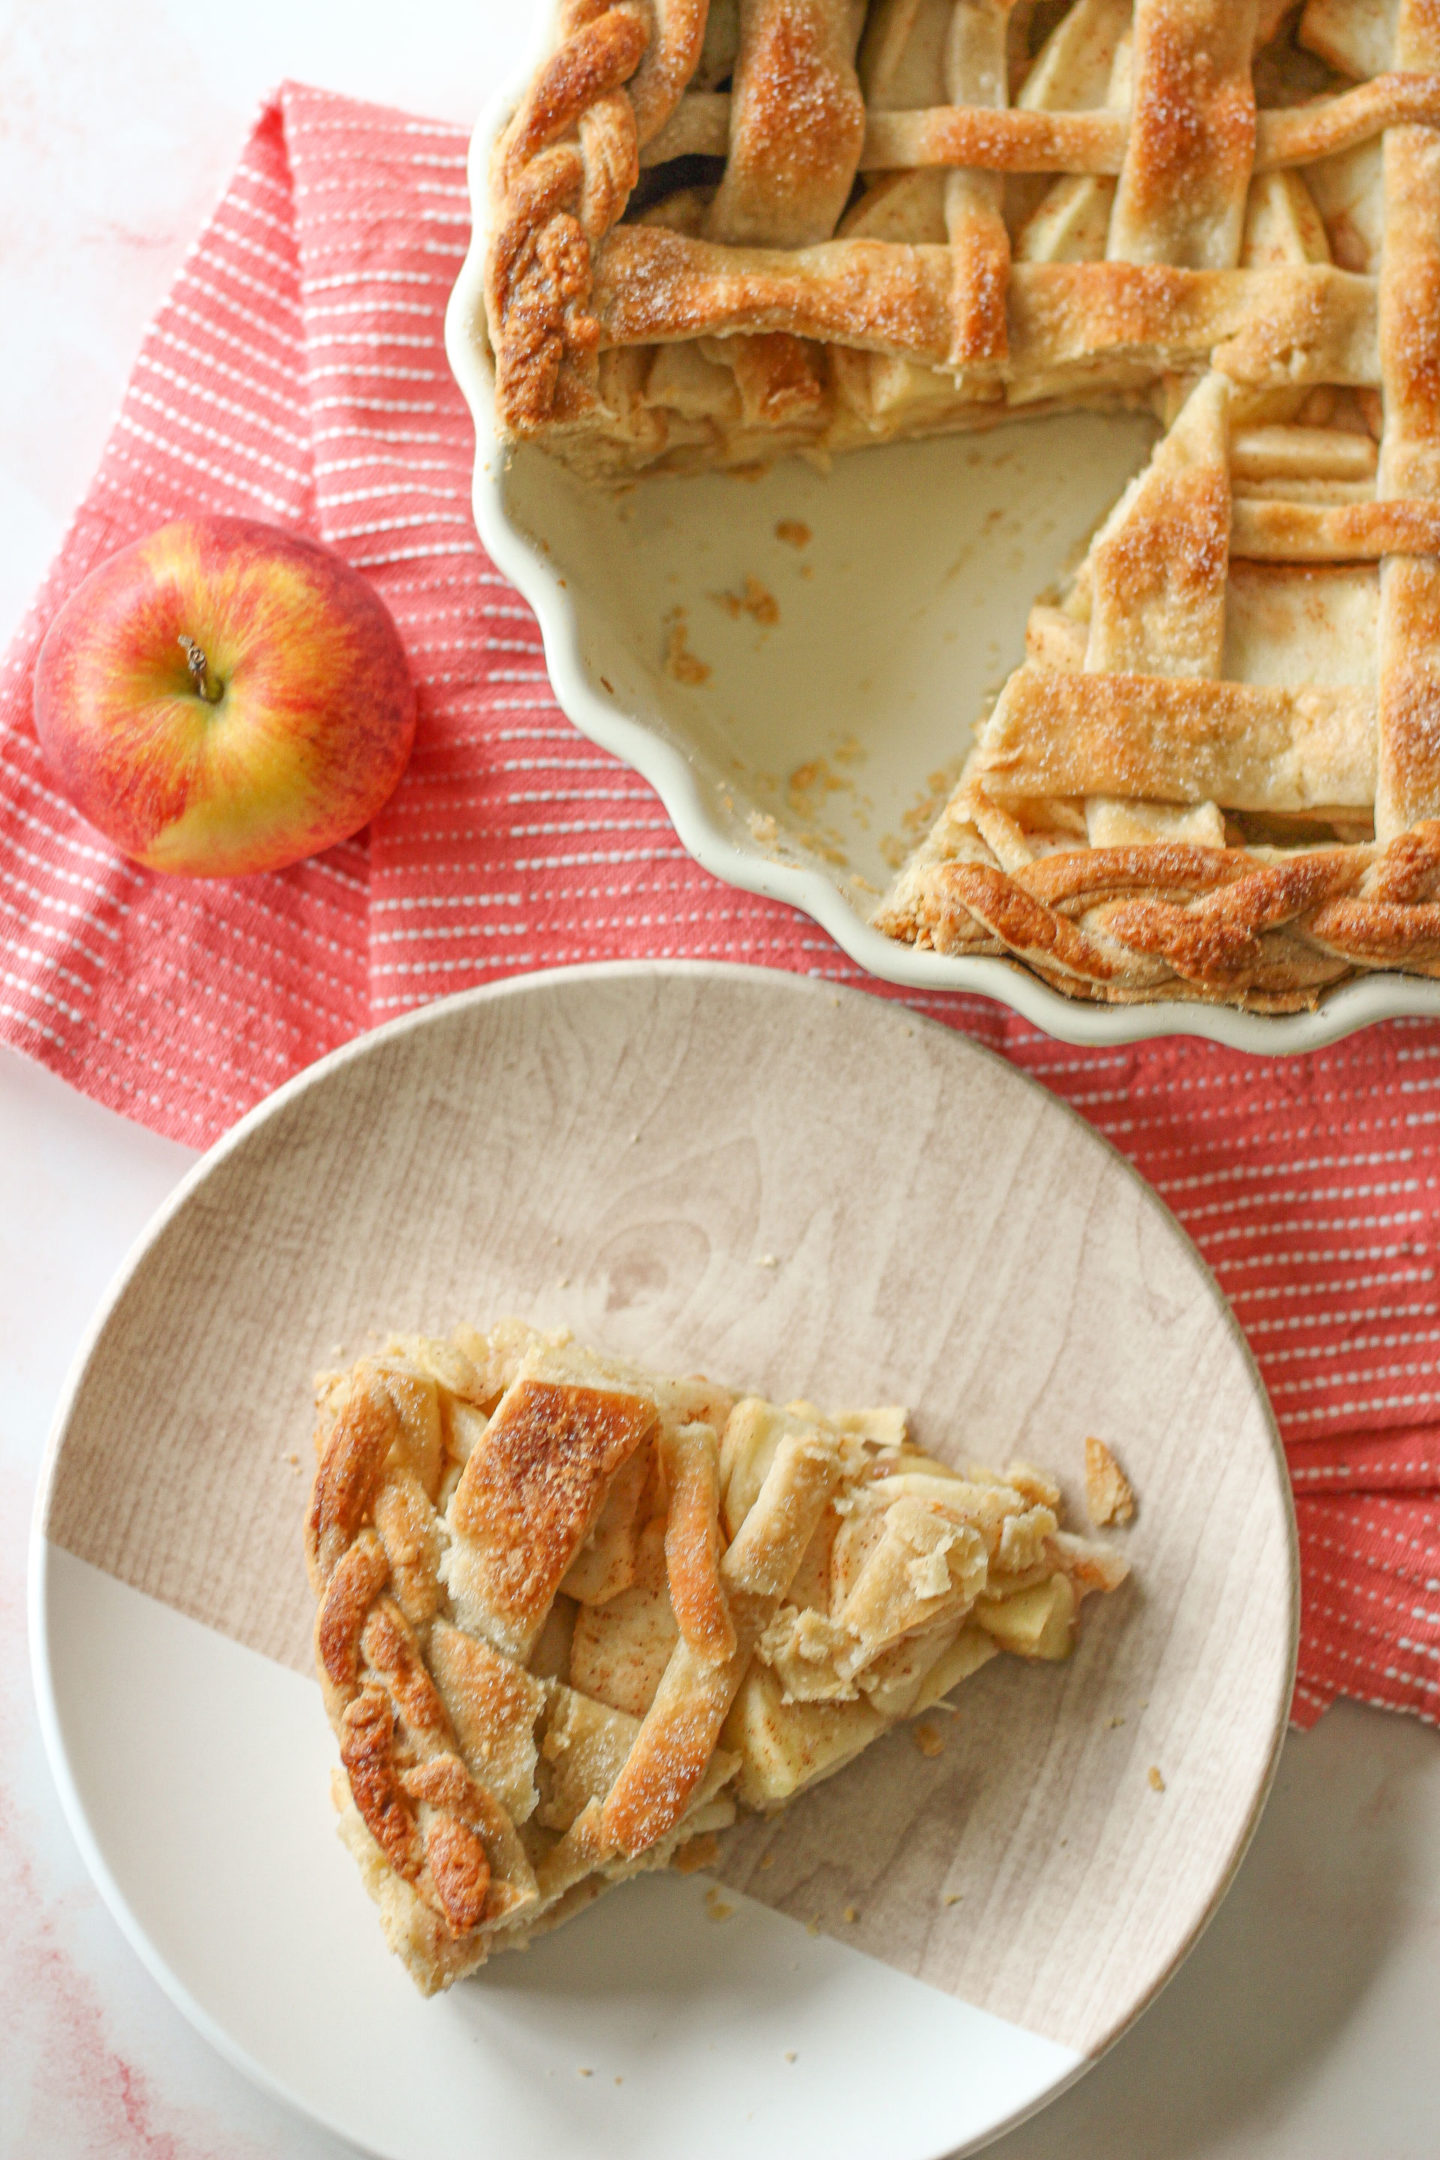
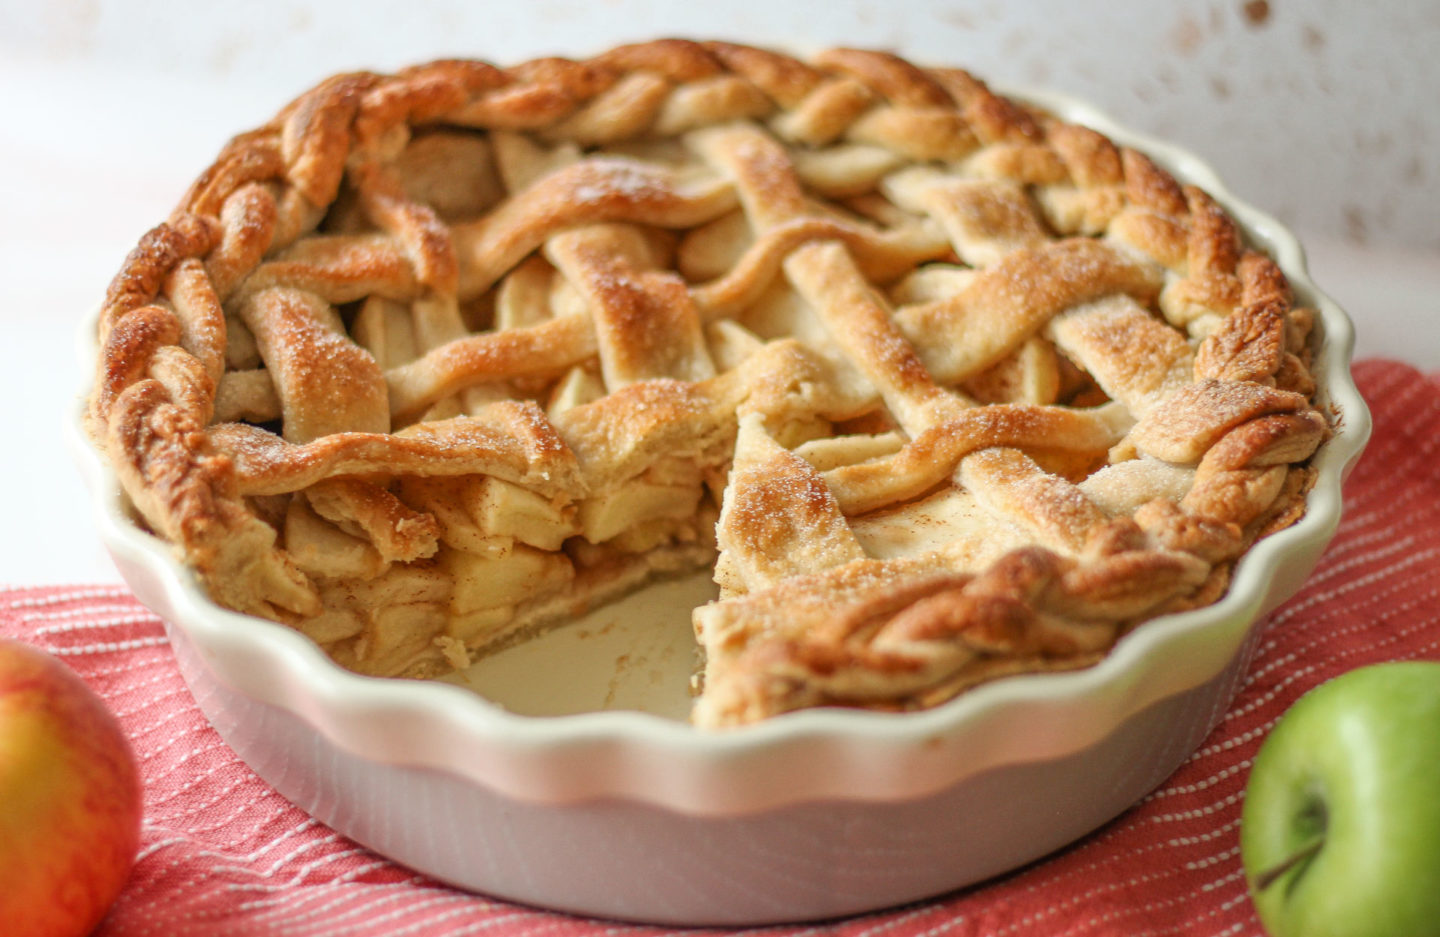
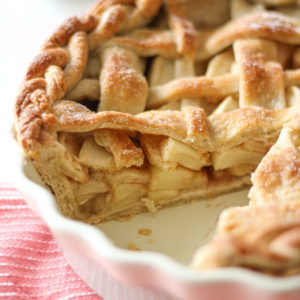
Filled with soft apples and topped with a buttery homemade shortcrust pastry, this simple lattice apple pie is fun to decorate and surprisingly easy to make!
This post may contain affiliate links. For more information, see my Full Disclosure.
I’ve been wanting to work on a pie recipe for so long, and I’ve always loved the appearance of lattice pies. They seemed a little challenging yet fun to decorate, allowing for lots of creativity!
So it was decided, my first pie had to be a lattice apple pie!
Lattice apple pie recipe ingredients
This pie is filled with a deliciously soft and sweet homemade apple filling, and I talk more about the type of apples to use in the FAQs below!
Full ingredient amounts for this easy apple pie recipe can be found in the recipe card at the bottom of this post, but in summary, you’ll need:
Homemade sweet shortcrust pastry
- Plain flour for the main pastry structure
- Butter helps create a flakey pastry with delicious buttery flavour
- Shortening helps create a more manageable dough, making it easier to roll out, shape and handle in general!
- Icing sugar to slightly sweeten the pastry
- Salt to balance the flavours
- Egg to help bind the dough and add colour to the pastry
- Water also helps bind the dough
Homemade apple pie filling
- Bramley cooking apples have a great texture and flavour which works perfectly in apple pies
- Eating apples are also added to give a slightly different texture and flavour to the pie filling. I used Granny Smith but I have some other suggestions in the FAQs further down the post!
- Caster sugar for sweetness
- Cornflour to help thicken the apple pie filling
- Cinnamon because apple and cinnamon are meant to be together!
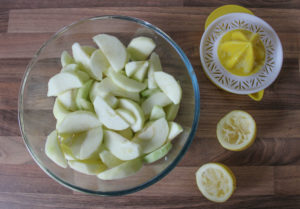
- Lemon juice helps prevent the apples from browning once cored and sliced
How to make an apple pie with lattice top from scratch
Full instructions with step-by-step photos can be found in the recipe card at the bottom of this post, but here’s a quick summary:
How to make sweet shortcrust pastry
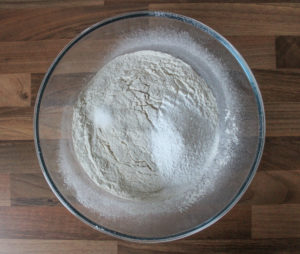
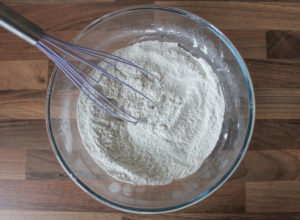
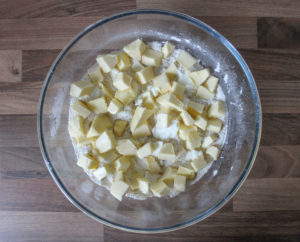
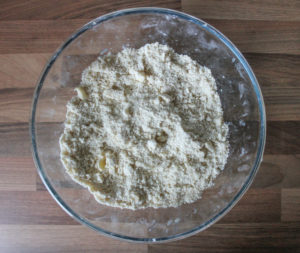
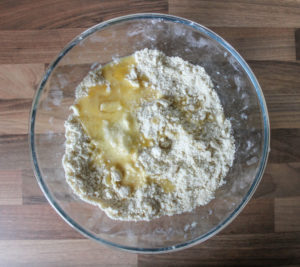
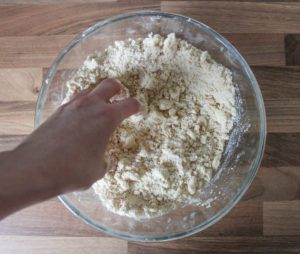
- Add the plain flour, icing sugar and salt to a large mixing bowl and whisk to combine. Add the butter and shortening and begin rubbing the fats into the flour with your fingers until it resembles rough bread crumbs
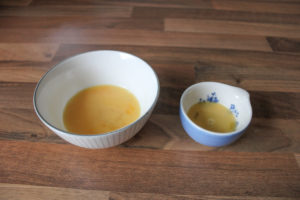
- Lightly whisk your egg, remove 2 tablespoons and set aside in a smaller bowl. This will be used as an egg wash for your pie top later!
- Add the remaining beaten egg and around 6-7 tablespoons of cold water to the large bowl and gently knead together until a smooth dough is formed
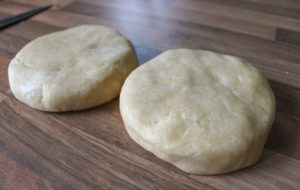
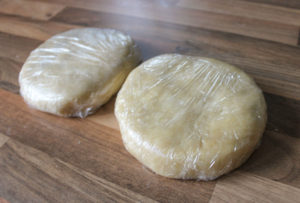
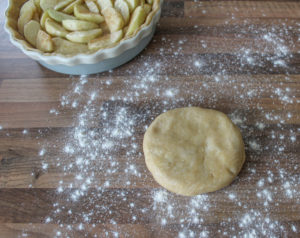
- Cut the dough into two equal pieces, wrap in film and chill both in the fridge for around 1.5 hours
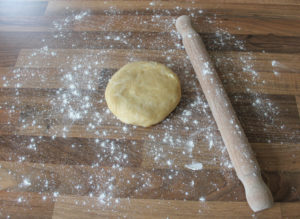
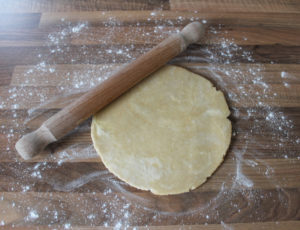
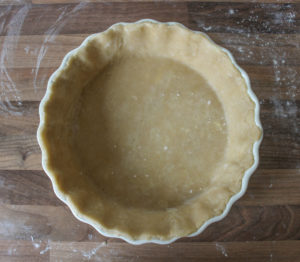
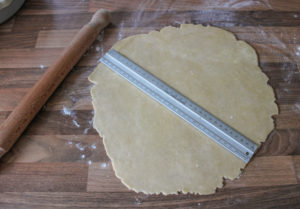
- Once chilled, roll out to a 30cm circle and gently place into your deep pie dish* and press gently into the dish. Chill in the fridge while you make the filling
* Choose a pie dish which measures around 30cm total, base and sides. For example, I use this pie dish and the base measures around 25cm and sides around about 5cm. So a 30cm disc of pastry fits nicely inside!
How to make homemade apple pie filling
- Peel, core and slice your apples and place into a large mixing bowl
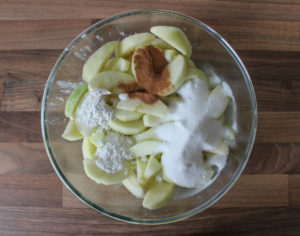
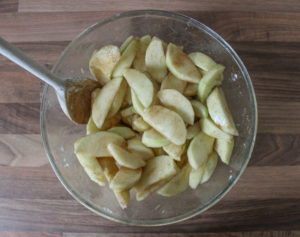
- Add the lemon juice, then the sugar, cornflour and cinnamon and stir to coat the apple slices evenly
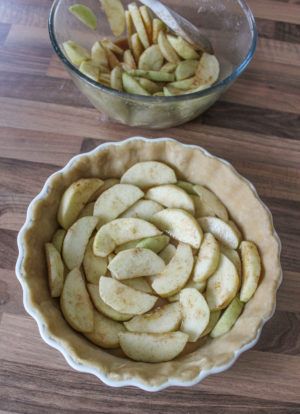
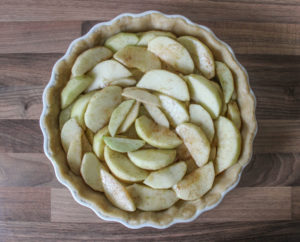
- Add the apple slices to your pie dish
How to make the lattice pie top
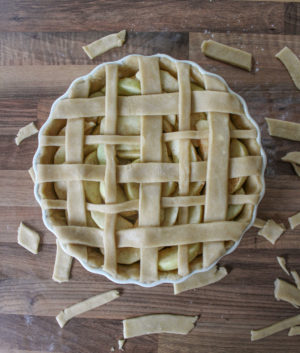
- Roll out your remaining half of chilled dough to a 30cm circle and cut several strips with a pizza cutter or long knife
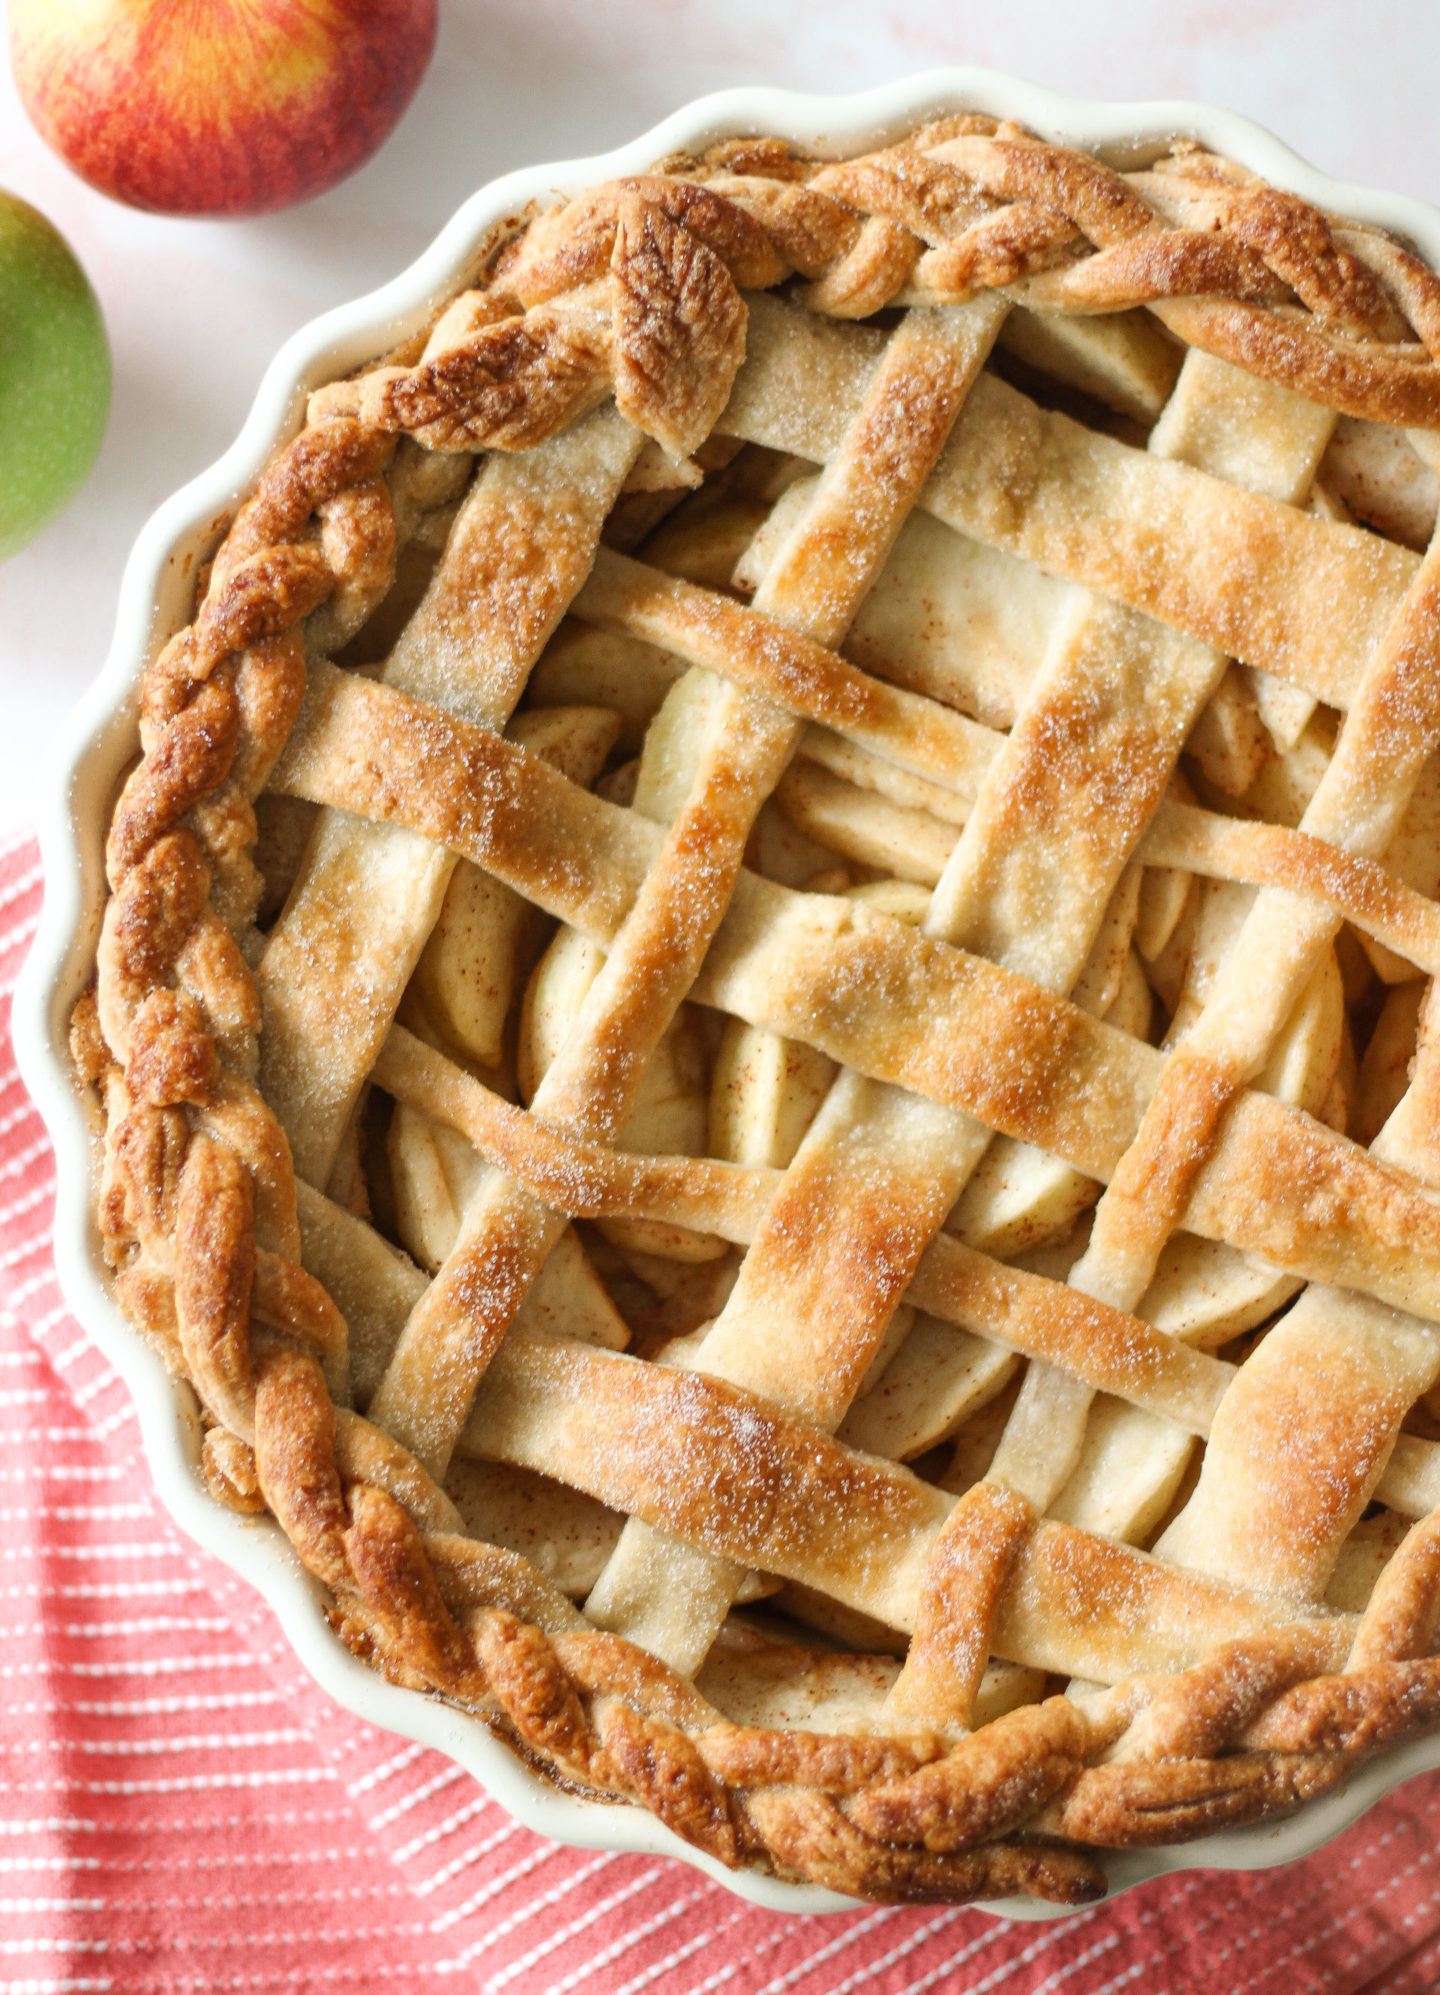
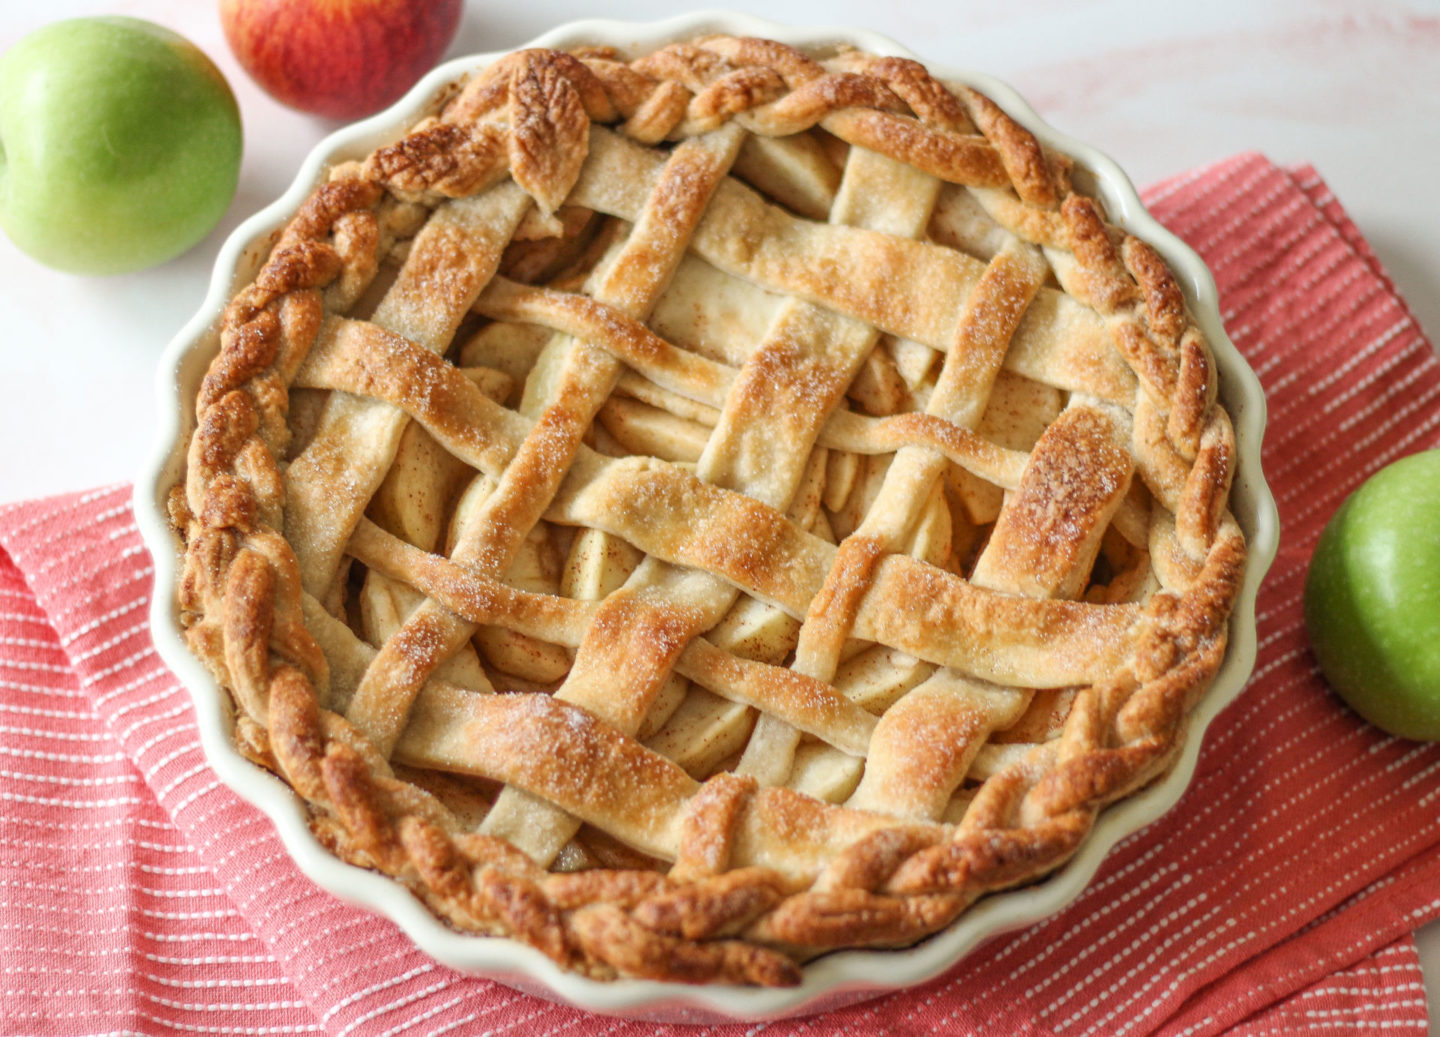
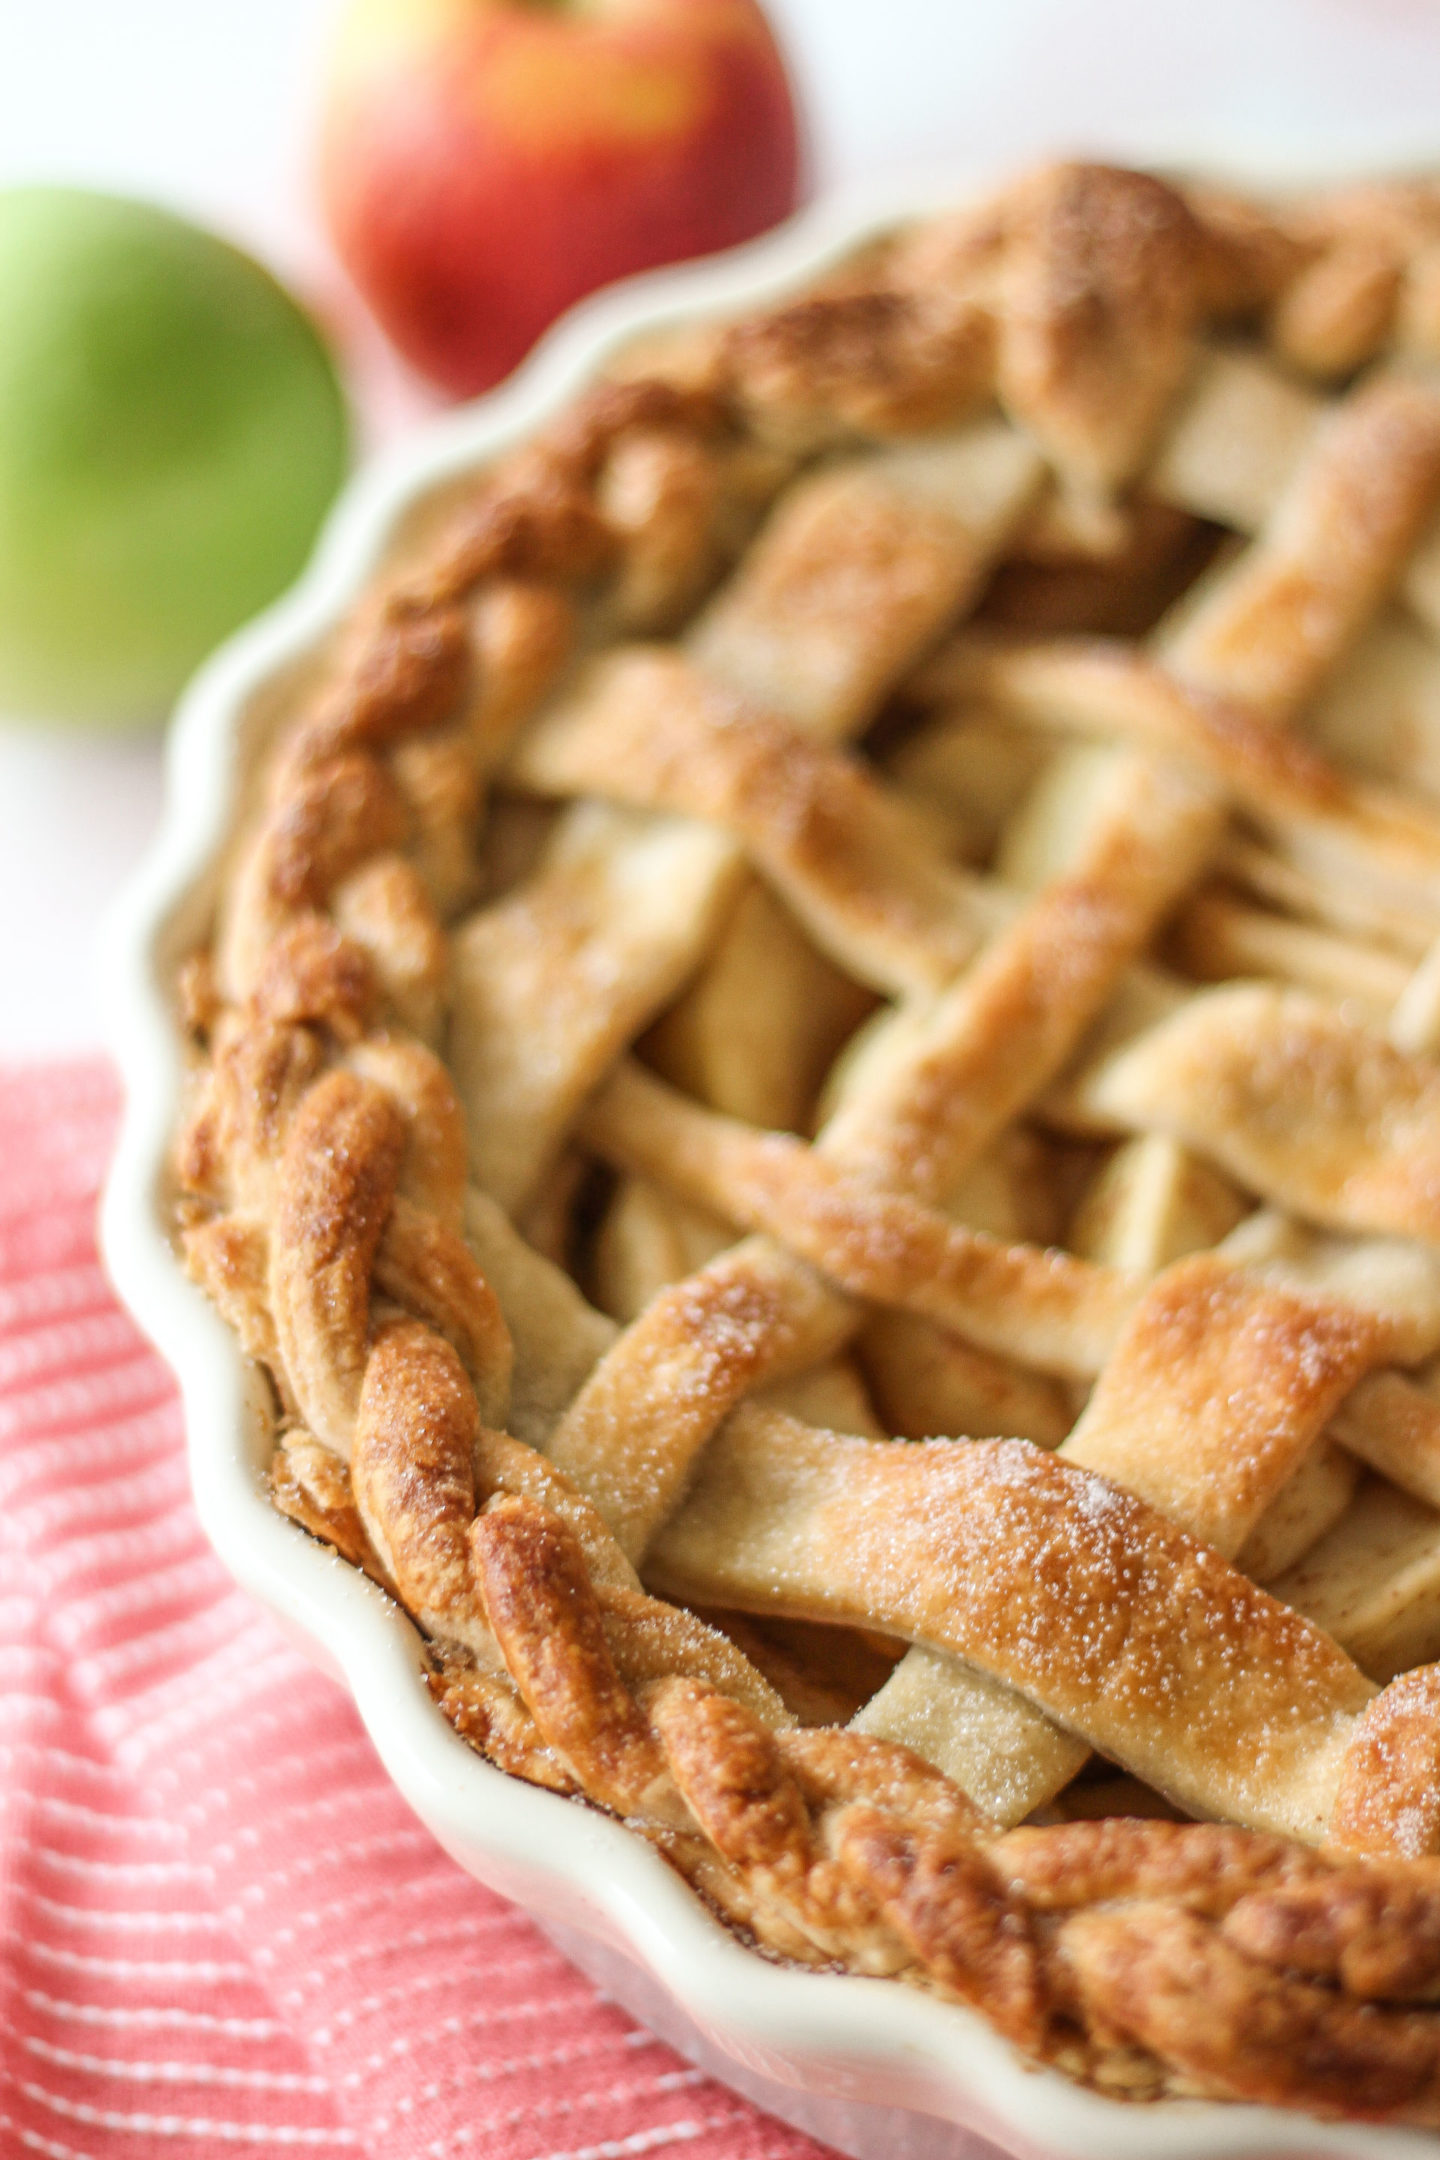
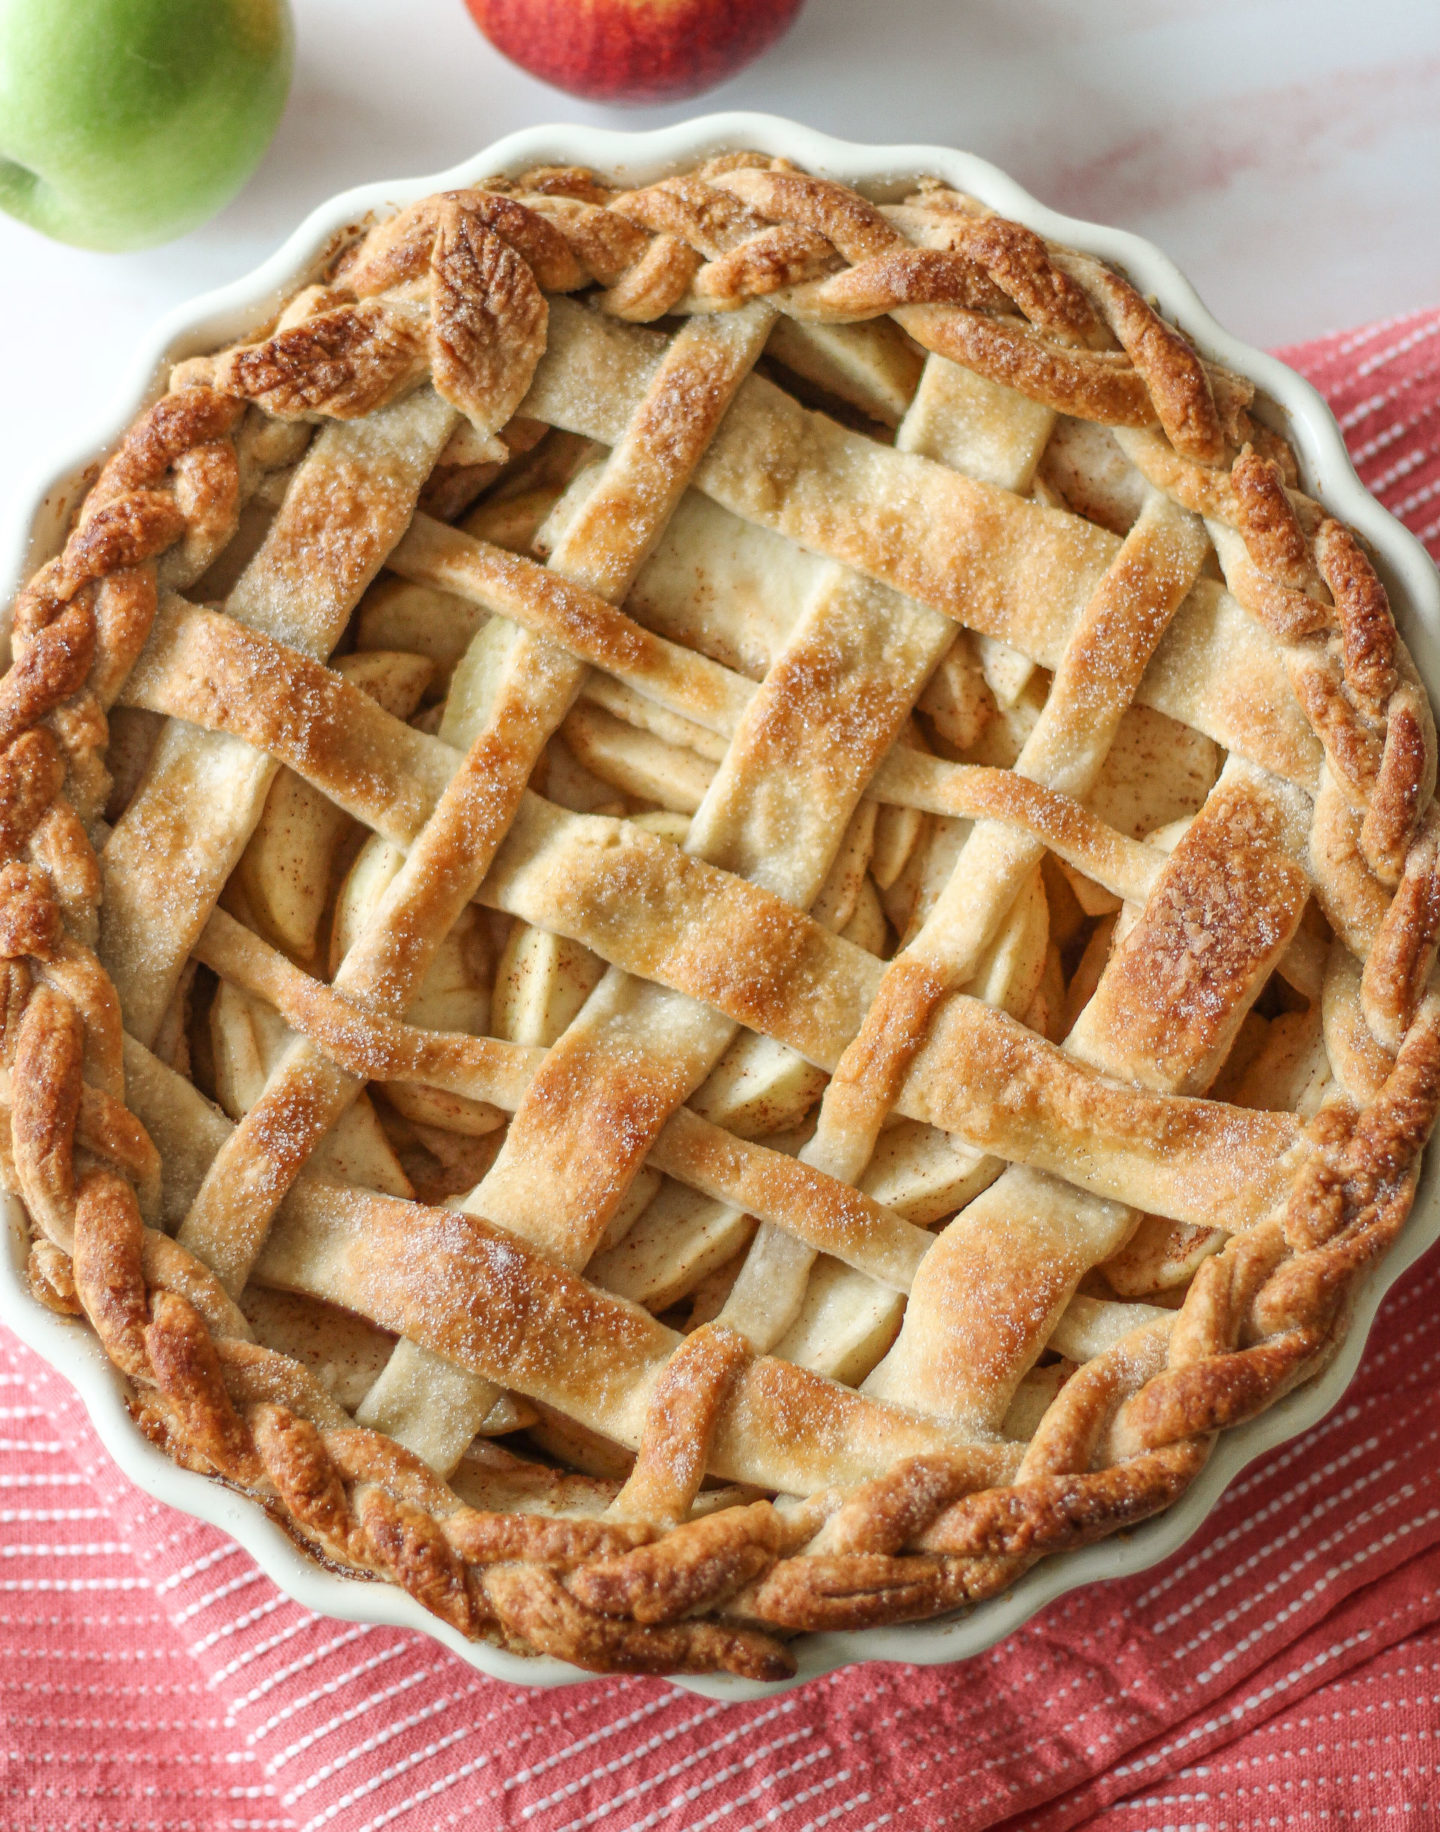
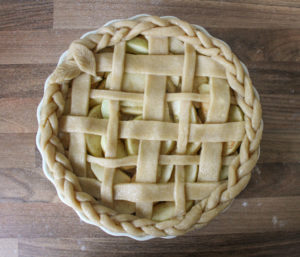
- Place several strips across the top of the pie, gently lifting over and tucking under to create your chosen woven lattice pattern!
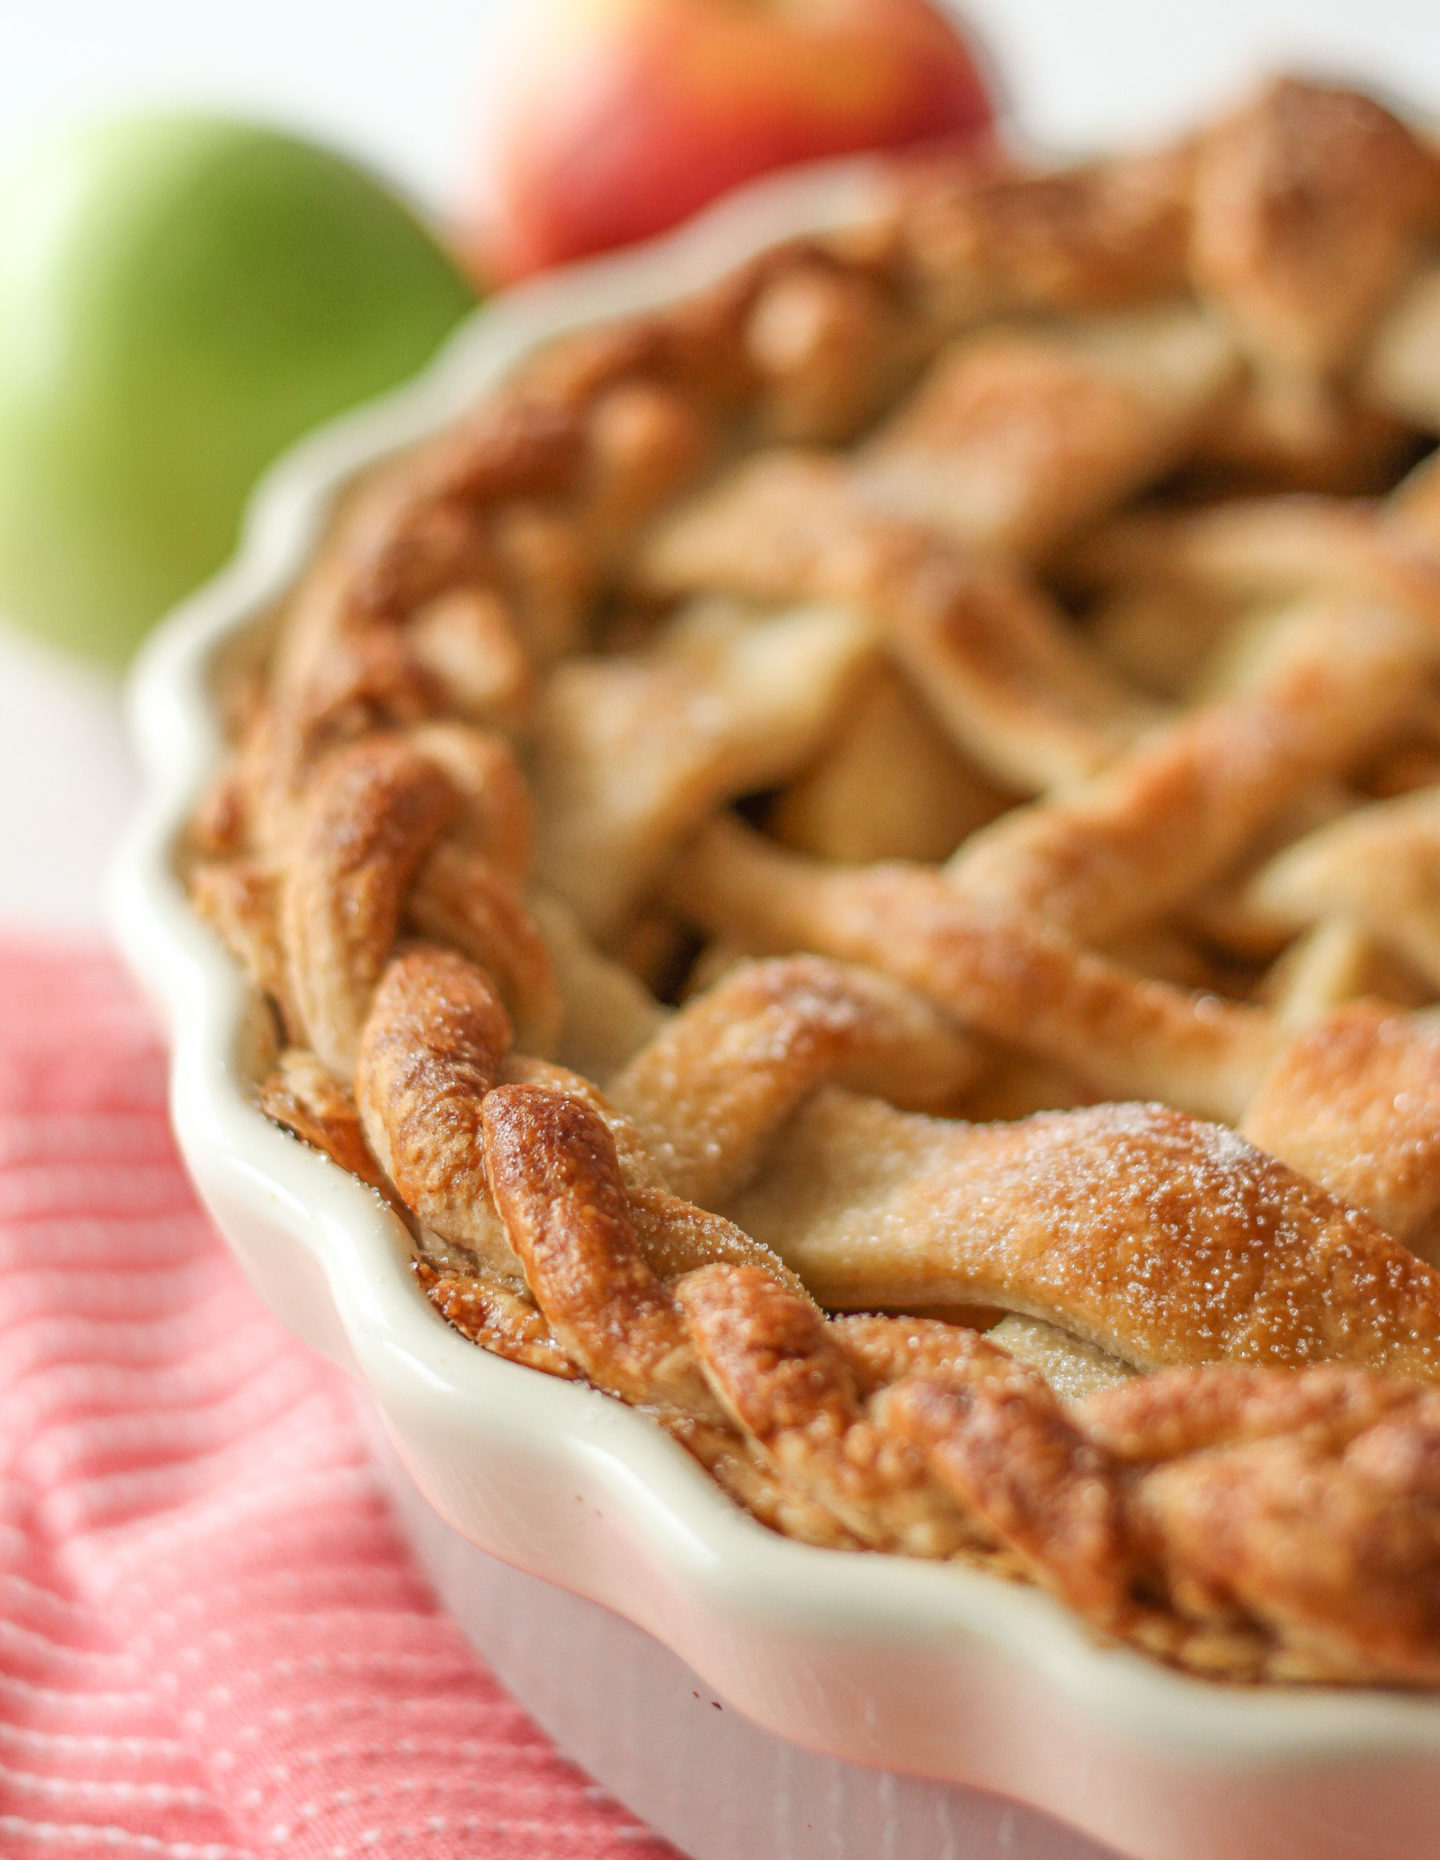
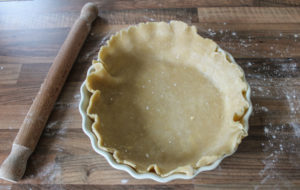
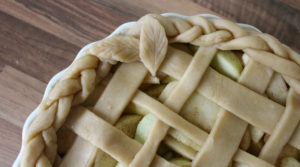
- To make a plaited crust, press your leftover pastry strips and scraps together, roll out and cut 6 further strips. Create two 3-strand plaits and join them together around the edge of the pie dish
- Stick down the edges of your lattice and plaited crust with your leftover egg mixed with a little milk
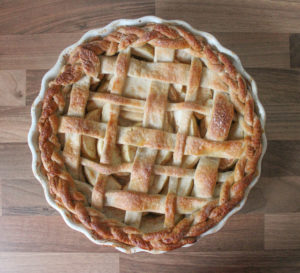
- Brush this egg wash over the entire lattice top; this will create a shiny pastry once baked
- Sprinkle with caster sugar and bake for around 45 minutes until golden brown!
Tips for making the best homemade lattice apple pie
- When working with this pastry, it’s best to keep things cold. This includes the ingredients and your hands! Use butter and shortening straight from your fridge, and if your hands become warm when handling the dough, run them under cold water and dry them before handling the dough again. It also helps if the room temperature is cool to prevent your pastry sticking to your counter!
- Try not to knead or handle your pastry too much. The more you knead it, the more you develop the gluten strands, making the dough tough instead of light and flakey
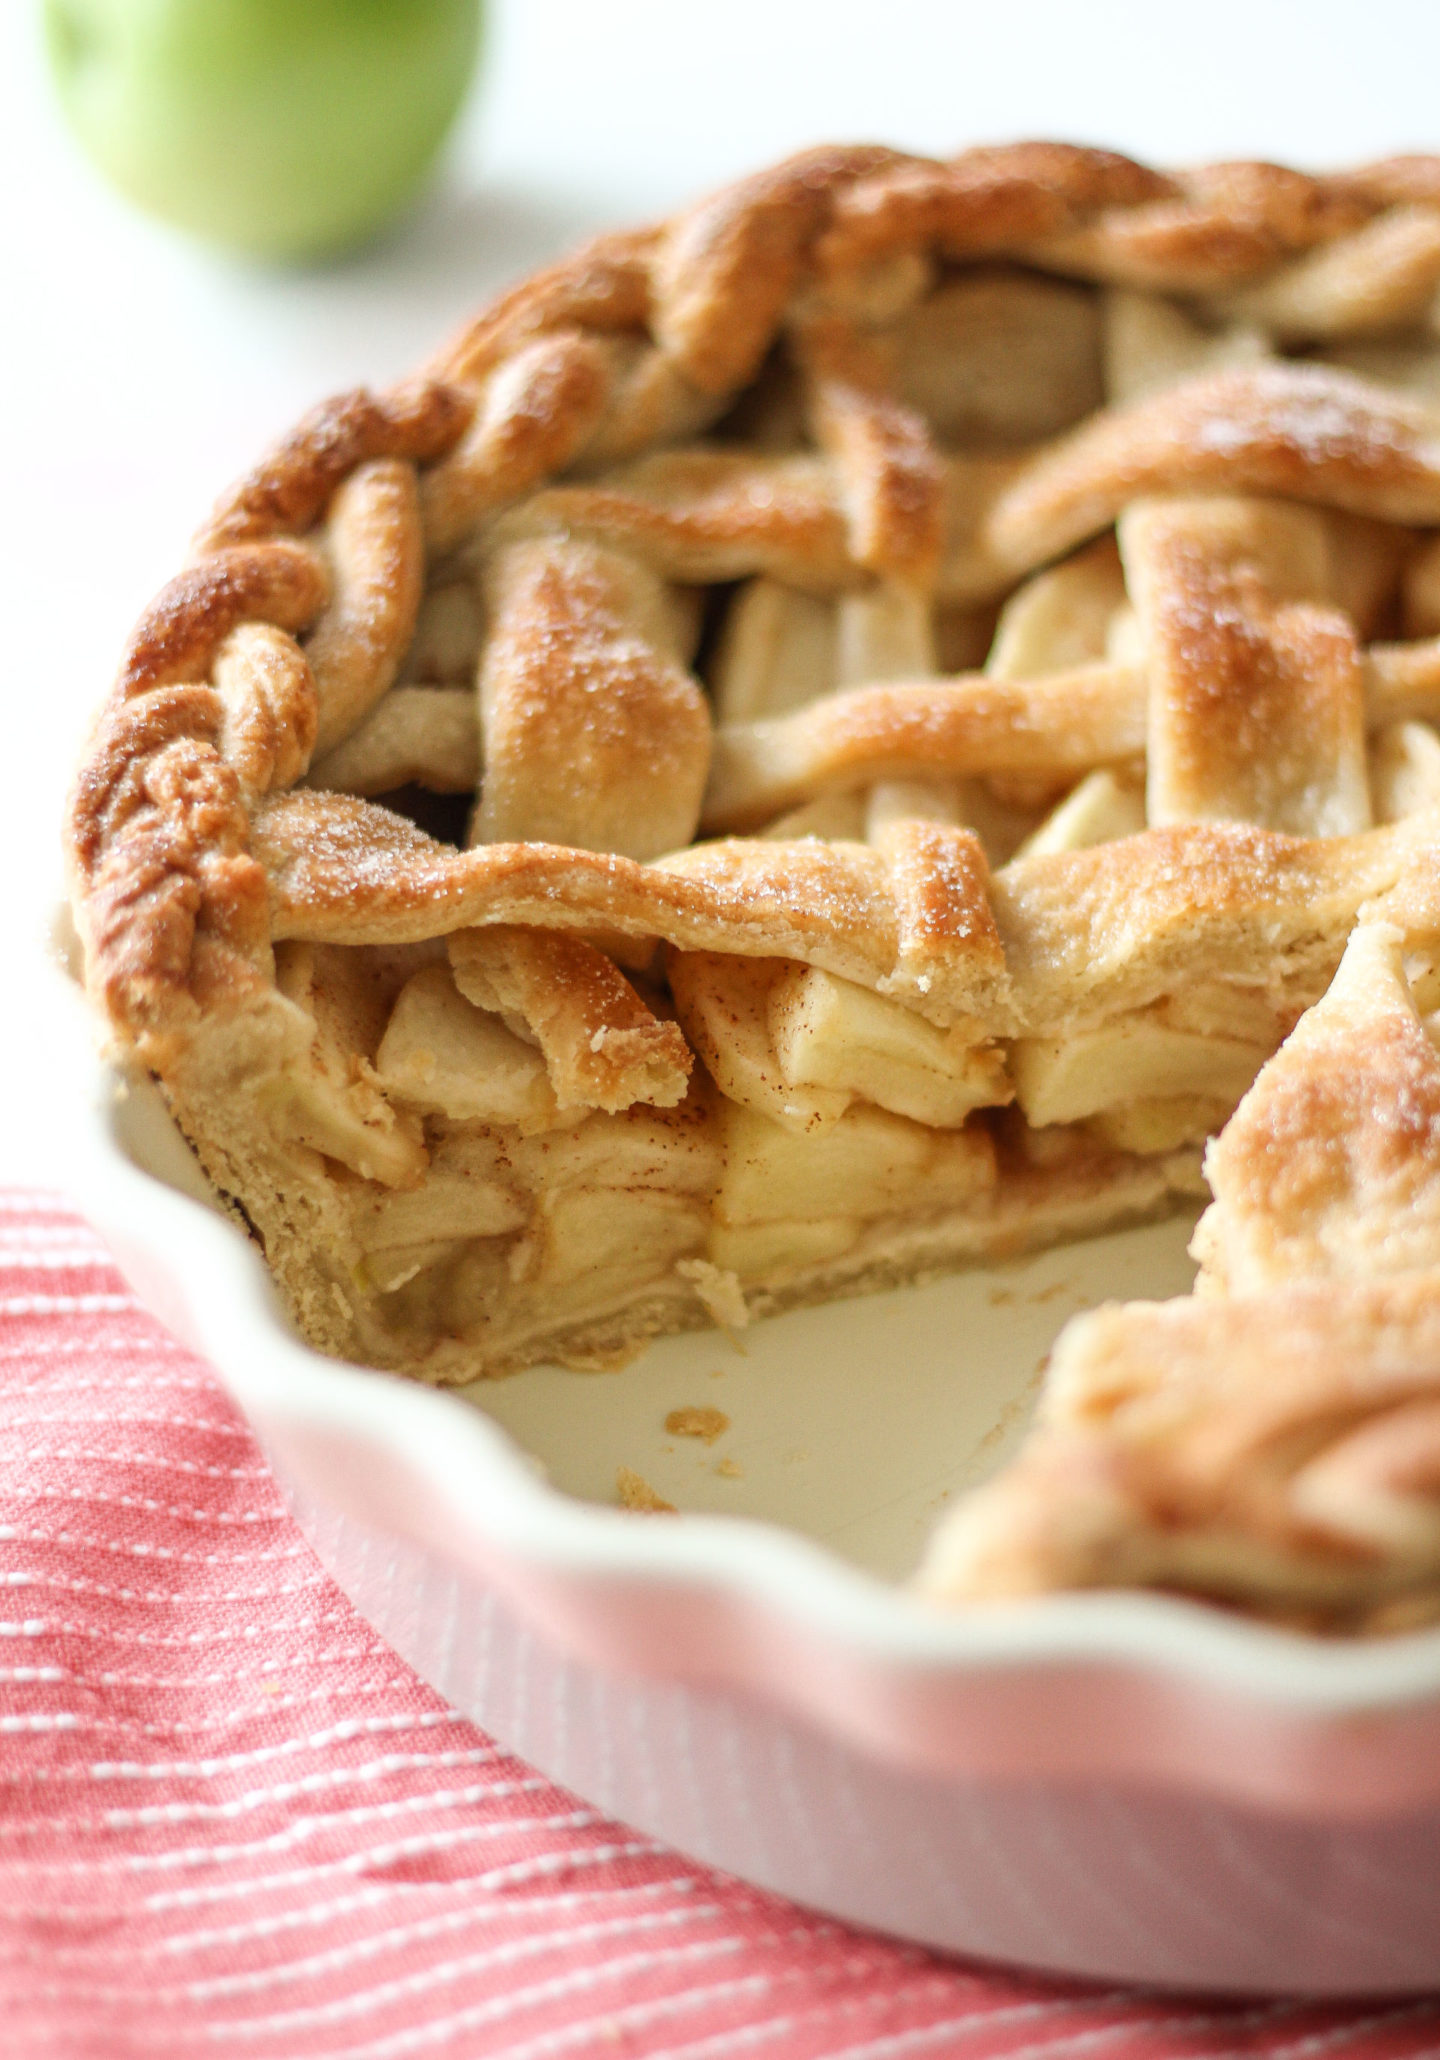
- Be sure to use apples which are suitable for pie fillings. I discuss this more in the FAQs below but ideally, you want apples that retain their shape when sliced and baked i.e. don’t turn to mush!
- When adding your apple slices to your pie dish, try to keep the liquid behind in your bowl. This is to help prevent a soggy bottom on your baked apple pie!
- If you’d like to create a plaited crust like mine, I’ve added lots of step-by-step photos to the recipe card below! However, you can also keep it simple by adding a smooth piece of pastry around the edge, then pressing it down with the back end of a fork to create pretty grooves in your pie crust!
- I suggest brushing your pastry top with an egg wash made up of lightly beaten egg and milk. This adds a lovely shine to the pastry once baked, plus acts as a ‘glue’ to stick down your lattice, crust and other pastry decorations! I added some simple leaf shapes to my pie crust to finish 🙂
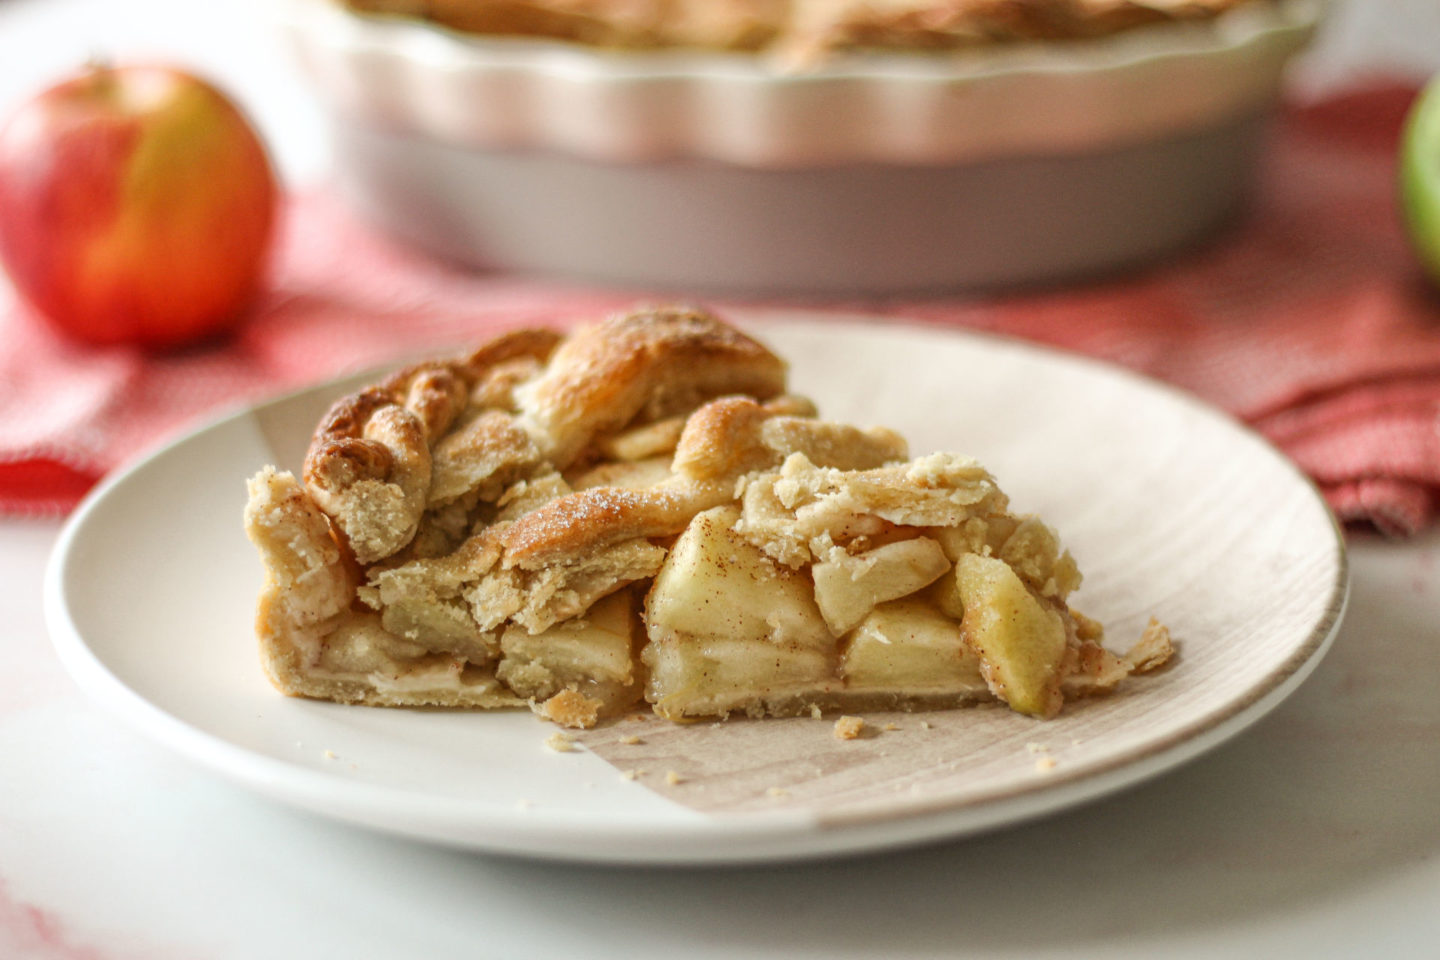
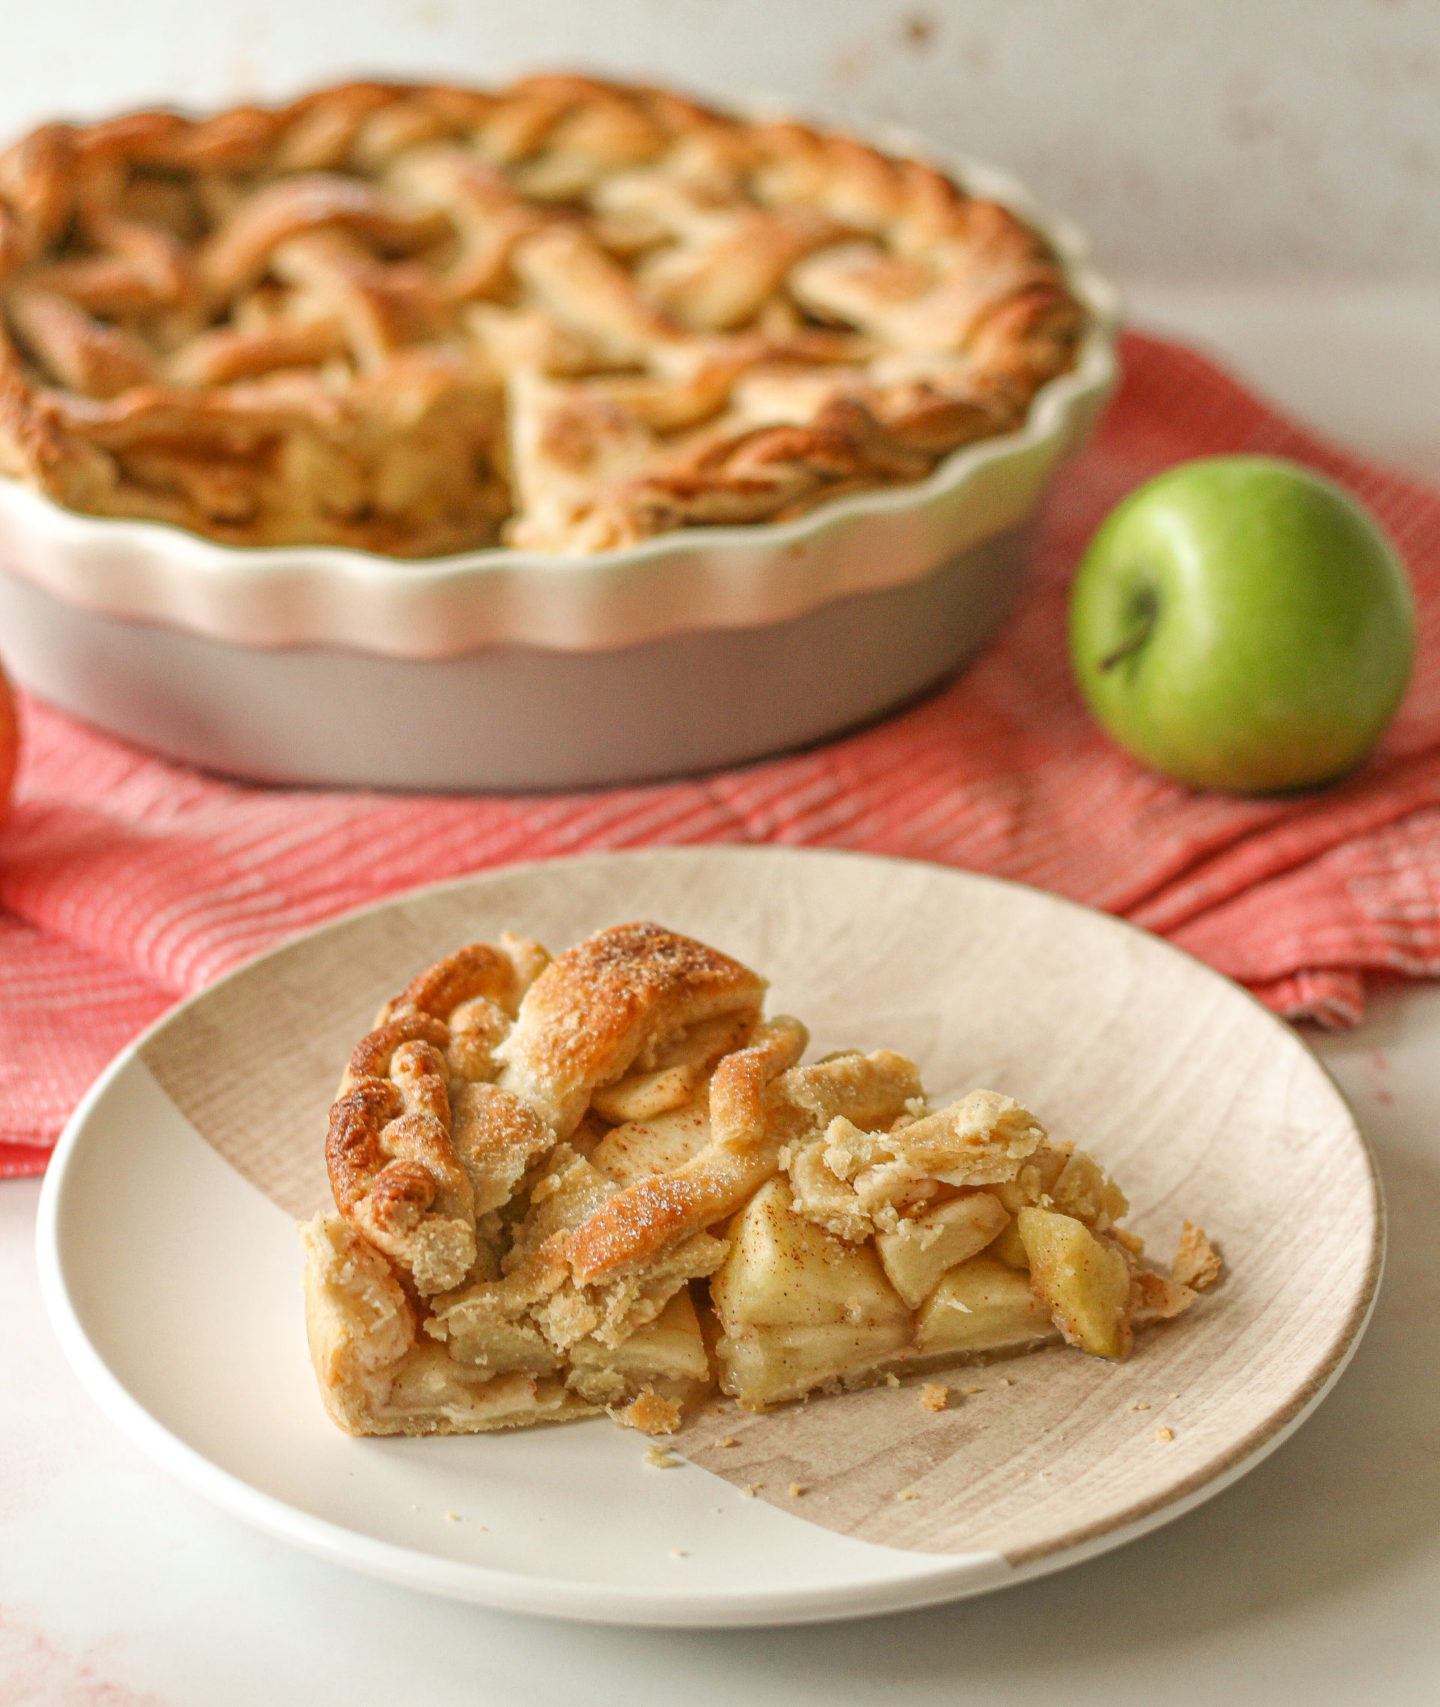
- Once the pie has baked, try to be patient before slicing into it; as it cools the filling thickens, allowing you to cut neater, fuller slices without the filling pouring out!
lattice apple pie FAQs
What are the best apples to use in apple pie?
Cooking apples are perfect for pies, as their texture and flavour work brilliantly. As for ‘eating’ apples, some suggestions include Granny Smith, Honey Crisp and Braeburn apples. Again, they’re known for bringing a good level of tart apple flavour, as well as having a good texture so the apple slices don’t soften too much as they bake.
Sweeter apples such as Gala apples break down and go very soft (due to the higher sugar content) so won’t hold their shape very well once baked. Fuji apples have a higher water content and can lead to soggy pie bottoms so I’d advise against these too!
Should you cook apples before making apple pie?
No, there is no need to cook them with this recipe. Simply slice the apples and immediately coat them in lemon juice and the other filling ingredients. Lemon juice helps to stop the apple slices from browning once peeled, cored and sliced!
Do I need to peel apples before adding to apple pie?
Yes, I suggest you do this as the skin can become quite stringy. Plus, the apple slices won’t bind together so well once baked!
Why is egg wash brushed on to pie pastry?
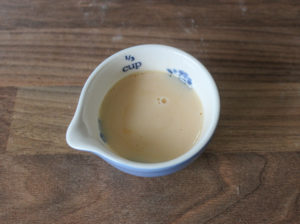
Egg wash is used to give the pastry top a lovely shine. It also acts as a ‘glue’ to help stick your lattice strips, plaited crust and other chosen pastry decorations down. The egg wash used in this recipe is a simple mixture of two tablespoons of lightly beaten egg and a tablespoon of milk. I highly recommend adding the egg wash to your pastry or it will look dull once baked!
How will I know when my apple pie is baked?
Your shortcrust pastry should be a nice golden brown colour. The filling should also be bubbling slightly, and the apple slices should feel lovely and soft when you gently poke a knife into them!
How can I avoid a soggy bottom when baking an apple pie?
Firstly, when adding your apple pie slices to your pie dish, try to leave any excess liquid behind in the bowl. Any extra liquid in the pie dish at this point risks creating a soggy pie bottom.
Also, make sure that your pie is baked fully, and avoid using apples with a higher water content such as Fuji as they will release more liquid as they bake.
How can I prevent my lattice pie crust from burning?
If you feel your pie top is becoming too brown when baking, simple place a loose ‘tent’ of foil on top, so that it’s covering the pie but not completely touching the pie top. This helps to bounce some heat away from the top, helping the pie to cook through inside without the outside over-browning!
How should I store homemade apple pie?
This pie can be kept at room temperature or in the fridge. The fridge should keep it fresh for a few days longer, plus it’s best kept in the fridge after slicing.
Can I freeze homemade apple pie?
Absolutely! Just double wrap the pie in its pie dish with film. It should keep well in the freezer for around 3-4 months.
You can also freeze an unbaked apple pie; the texture inside your pie will actually be better if you freeze the pie before baking rather than afterwards. You should bake the pie straight from frozen as allowing it to thaw will lead to a soggy pie bottom!
Just remember it will take a little longer to bake from frozen so keep a look out for that golden crust and the other signs mentioned above!
To conclude, this lattice apple pie is:
- Comforting, delicious and surprisingly simple to make (with lots of photos to help along the way!)
- Made up of a buttery golden shortcrust pastry and a sweet, soft apple filling
- Fun to decorate – a great way to get creative!
- Suitable for making ahead and freezing before baking
- A great dessert to feed a crowd
If you try this recipe I’d love to see! You can show me by tagging me @bakerjoblog or using #bakerjoblog!
Other dessert recipes to try:
- No-Bake Baileys Cheesecake
- No-Churn Oreo Ice Cream
- Black Forest Swiss Roll
- No-Bake Mint Chocolate Cheesecake
- No-Churn Biscoff Ice Cream
- Strawberry Pavlova
- No-Churn Strawberry Cheesecake Ice Cream
- No-Bake Fresh Fruit Tart
- Cocoa Dusted Chocolate Truffles
- No-Bake Strawberry White Chocolate Cheesecake
- White Chocolate Coconut Truffles
- No-Bake Lemon Cheesecake
Lattice Apple Pie
Equipment
- Deep pie dish, measuring around 30cm total (base and sides)
- Large mixing bowl
- Rolling Pin
- Pizza cutter or long knife
- Pastry brush
Ingredients
Sweet shortcrust pastry
- 400 g plain flour sifted
- 2 tbsp icing sugar sifted
- 1/2 tsp salt
- 150 g cold unsalted butter I use firm block-style butter, not the spreadable type
- 50 g shortening I use Trex
- 1 medium egg, separated Lightly whisk the egg then remove 2 tbsp and keep aside to use as egg wash
- 6-7 tbsp cold water The amount can differ so add it gradually until your pastry is the right texture
Apple pie filling
- 4 medium cooking apples around 900g whole weight
- 2 medium eating apples I use Granny Smith but Honey Crisp or Braeburn work too. Around 200g whole weight
- 120 g caster sugar
- 2 tbsp cornflour level
- 1 tsp cinnamon level
- Juice of 1 medium lemon
Pastry topping
- 1 tbsp milk add this to your 2 tbsp leftover egg to make an egg wash!
- 1 tbsp caster sugar to sprinkle on top before baking
Instructions
Sweet shortcrust pastry
- Add the plain flour, icing sugar and salt to your large mixing bowl and whisk together.
- Add cold cubed unsalted butter and shortening to the bowl and begin rubbing them into the flour mixture with your fingers. Continue doing this for a few minutes until the mixture resembles rough bread crumbs.
- Lightly whisk your egg and then remove two tablespoons and add to a separate smaller bowl. Set the smaller bowl aside for later; this will be mixed with a little milk to create an egg wash (to glaze your pie top!).
- Add the remaining larger bowl of beaten egg to the large mixing bowl. Add your cold water slowly, a tablespoon at a time, and gently knead the wet and dry ingredients together. The amount of water needed differs due to environmental factors, so you may need more or less than stated. I usually use around 6-7 tablespoons of water when making this pastry in my kitchen.
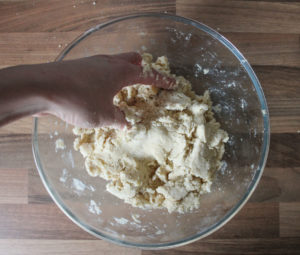
- You'll know you have the correct consistency when the dough is soft, with no large cracks. If the dough looks cracked, it is too dry so add a teaspoon or two of water and knead again. If the dough feels sticky or wet, just sprinkle a little extra flour into the bowl and knead again.
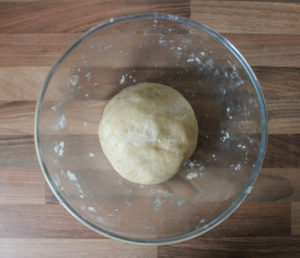
- Divide the dough into two equal pieces.

- Pat each piece into a ball then flatten each slightly to form discs. This will make them easier to roll out later!
- Wrap both discs in film and place in the fridge to chill and firm up for around 1-1.5 hours.
- Once chilled, lightly dust your work surface with flour and place one disc of dough on top. Lightly flour your rolling pin and roll the dough out vertically a few times before lifting it gently, turning slightly and repeating this motion. Try to lift it often to stop the dough from sticking to the counter, and turning it often helps it keep a circular shape!
- Continue rolling the dough out until it measures 30cm in diameter.
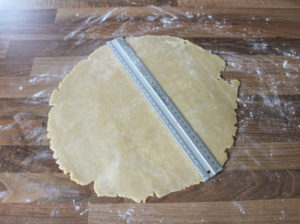
- Carefully lift the dough from the countertop into your pie dish. I find it easier to do this by lightly rolling the dough around the rolling pin and then rolling it back into the dish. You could also use both hands to spread the weight underneath the dough and quickly move it from the countertop to the pie dish!
- Gently press the dough into the corners and edges of your pie dish, all the way to the top edge of the dish. Don't worry if your dough cracked or has little holes, simple use any excess dough from the edges to patch them up! Be sure to patch up any holes or cracks at this stage to prevent your apple filling from leaking through when baking later.
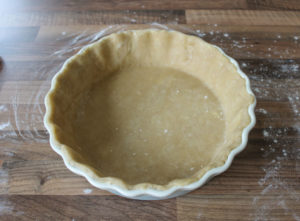
- Put the pie dish in your fridge to chill while you make the apple pie filling.
- Preheat your oven to 200°C/180°C fan.
Apple pie filling
- Peel, core and slice all of the apples and place the slices into a large mixing bowl. Add the lemon juice and mix together to coat the slices evenly.
- Next, add the caster sugar and cornflour and cinnamon and stir together to evenly coat the slices.
- Remove the pie dish from the fridge and add your apple slices. I place them in one by one rather than pouring them in all at once. I start from the outside edge working inwards and repeat this to create layers of apple slices. I find this helps prevent large gaps between apple slices!

- Lightly dust your work surface with flour again and place your second disc of dough on top. Roll out as before, lifting and turning often until it measures 30cm in diameter.
- Using a pizza cutter or large knife, cut several strips from this disc of dough and begin creating your lattice! The design is up to you; I've done a simple weave here where you lift one over and then one under. My thicker strips are about 2cm thick, and the thinner strips are around 1cmThis can get a little confusing so take your time. As you can see, the lattice pattern on the right side isn't quite right here; luckily I noticed before I baked it! 😉
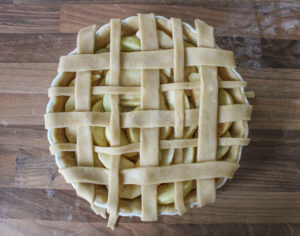
- Trim off the excess from the edges of the strips.
- Press the pieces of excess dough into a new ball of dough; this will form your pie crust!
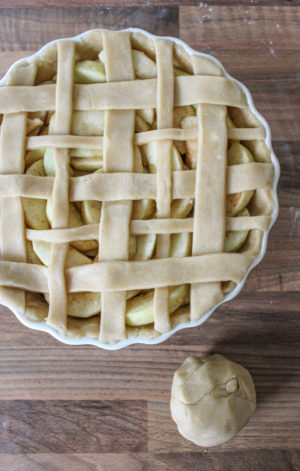
- You could just roll this out into 1 or 2 long sausage-like pieces, and wrap around the edge of the pie dish to create a simple pie crust. If doing this, finish it by pressing the back end of a fork into it to create pretty grooves!If you'd like to make a plaited crust like mine, roll your remaining dough into a long strip, around 40cm. Cut this strip in half.
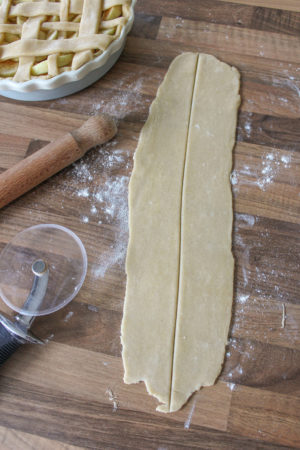
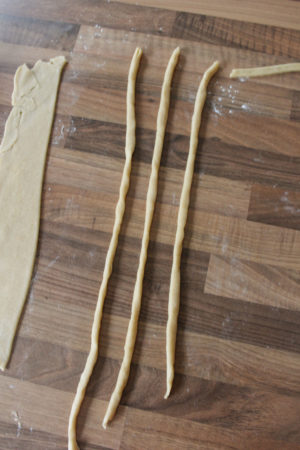
- Take one half and cut into three smaller strips.
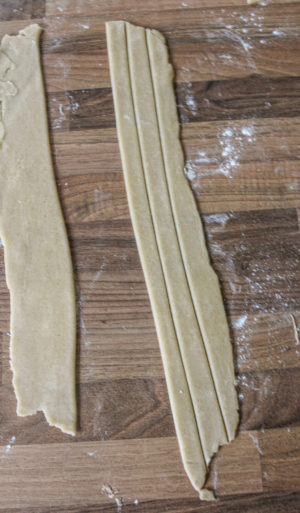
- Roll them into sausage-like strips with your hands!
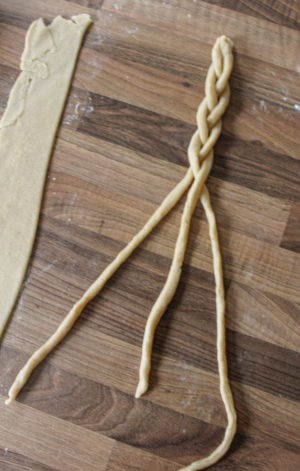
- Press the three strips together at the top, then begin plaiting them.Repeat the steps above with the second piece of dough so that you have two plaits.
- Add a tablespoon of milk to your small bowl of leftover egg and gently mix together to create your egg wash.
- Using a pastry brush, lift the outer edges of your lattice strips slightly, brush a little egg wash underneath and press the strip down to 'glue' it to the pie edge. To add your plaited or simple pie crust, brush more egg wash around the edge of the pie top and place the crust around the edge, pressing down gently to again 'glue' them down.
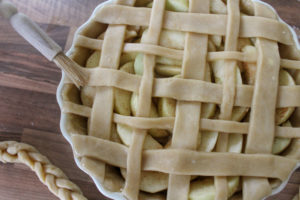
- Use any leftover dough to create any shapes you like to decorate! I opted for some simple leaf shapes, which I placed on top of one of the joins of my plaited crust to hide the join.
- Brush the whole pie top with egg wash and sprinkle 1 tablespoon of caster sugar on top.Place the pie onto the middle shelf of your preheated oven and bake for 15 minutes. After 15 minutes, reduce the temperature to 180°C/160° fan and bake for a further 30-35 minutes. The pie will be baked when the crust is a lovely golden brown colour, the filling should be bubbling slightly and an apple slice should feel very soft when you poke a sharp knife into it.
- Leave to cool completely before serving, as the filling thickens and firms up as it cools. This allows you to cut neater slices to serve.
- Best eaten within 3-4 days. Store at room temperature or in the fridge; it should keep a little longer when stored in the fridge.

